In this section, we will build a Site-to-Site (S2S) VPN between Azure and an on-premises environment using Azure VPN Gateway and Windows Server RRAS.

Task Details
1. Create an Azure Virtual Network (VNet).
2. Deploy an Azure VPN Gateway.
3. Create a Local Network Gateway.
4. Configure the on-premises VPN device with Windows Server RRAS.
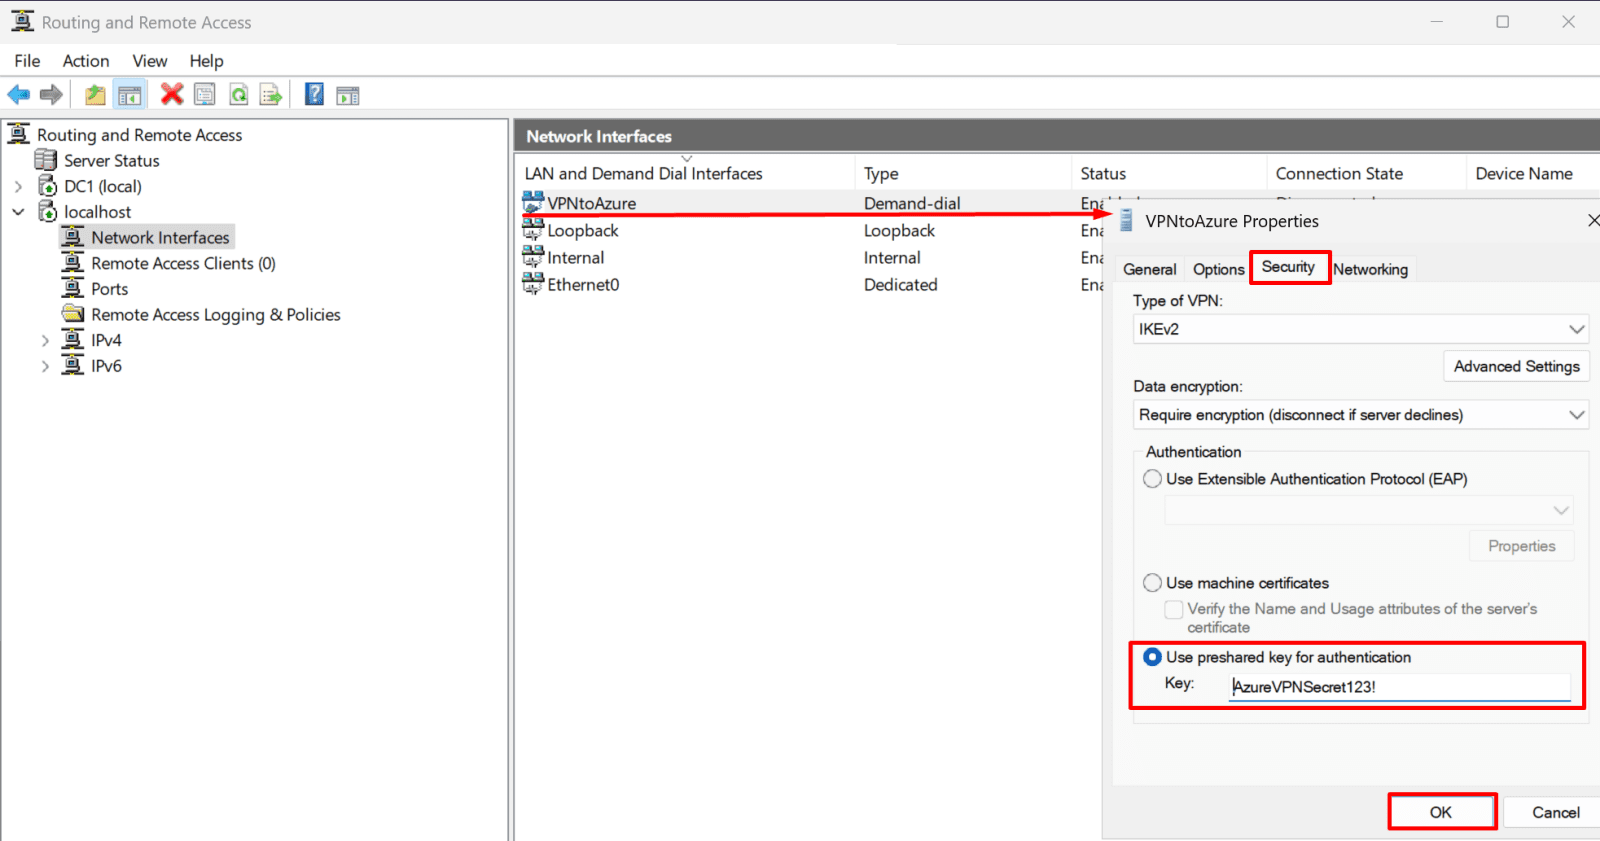
5. Configure the pre-shared key (PSK) on the RRAS server.
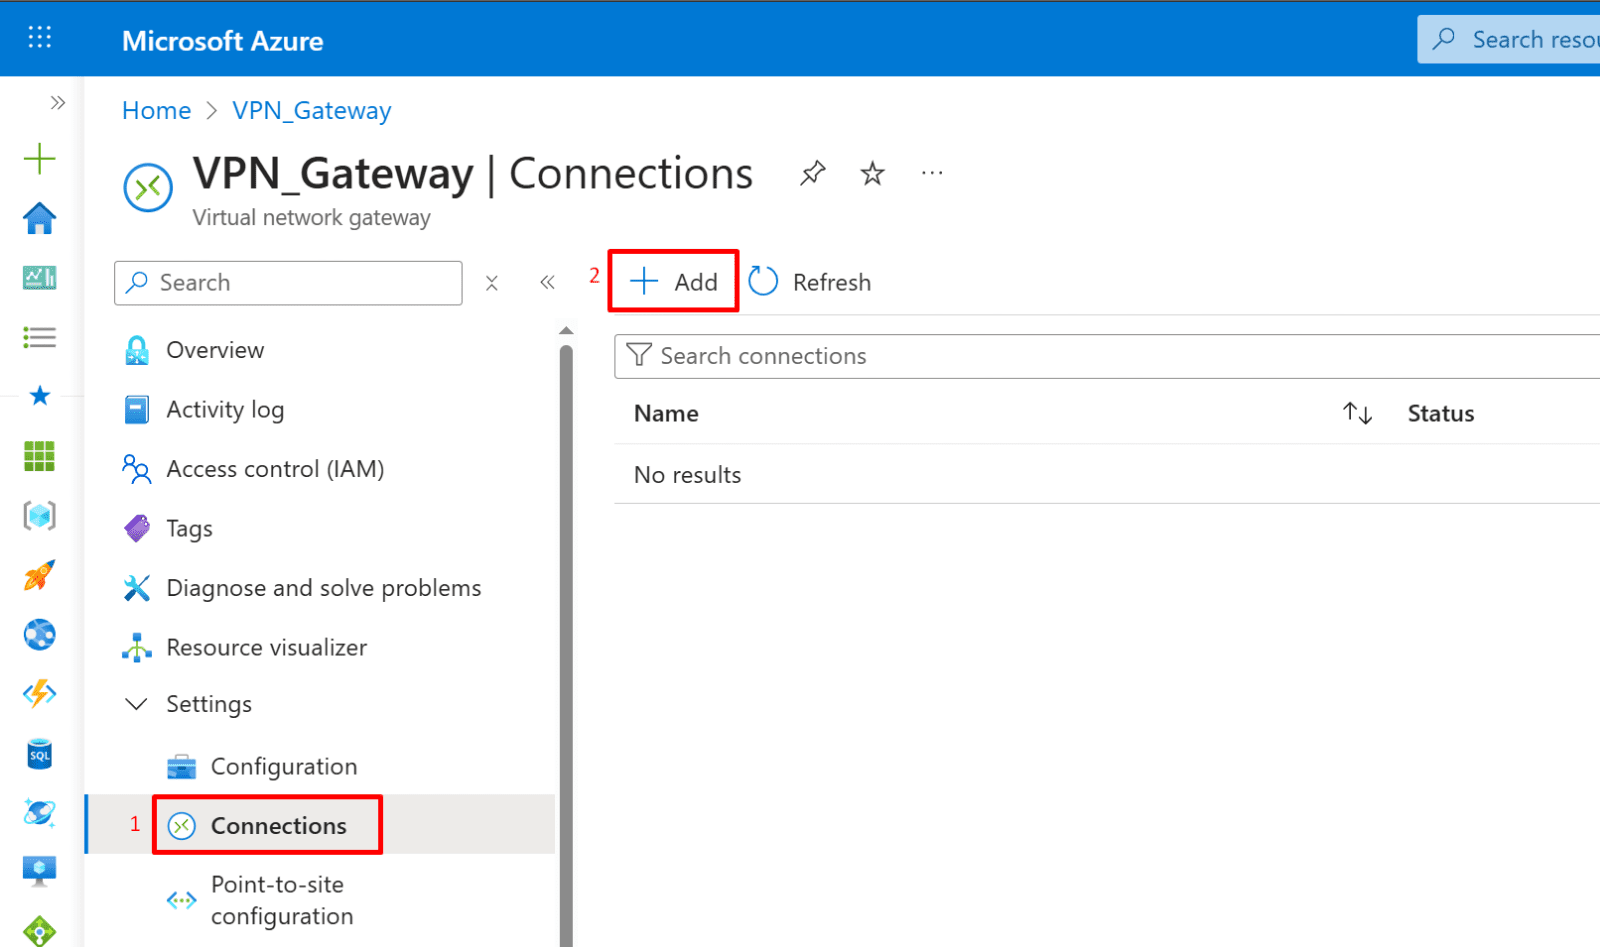
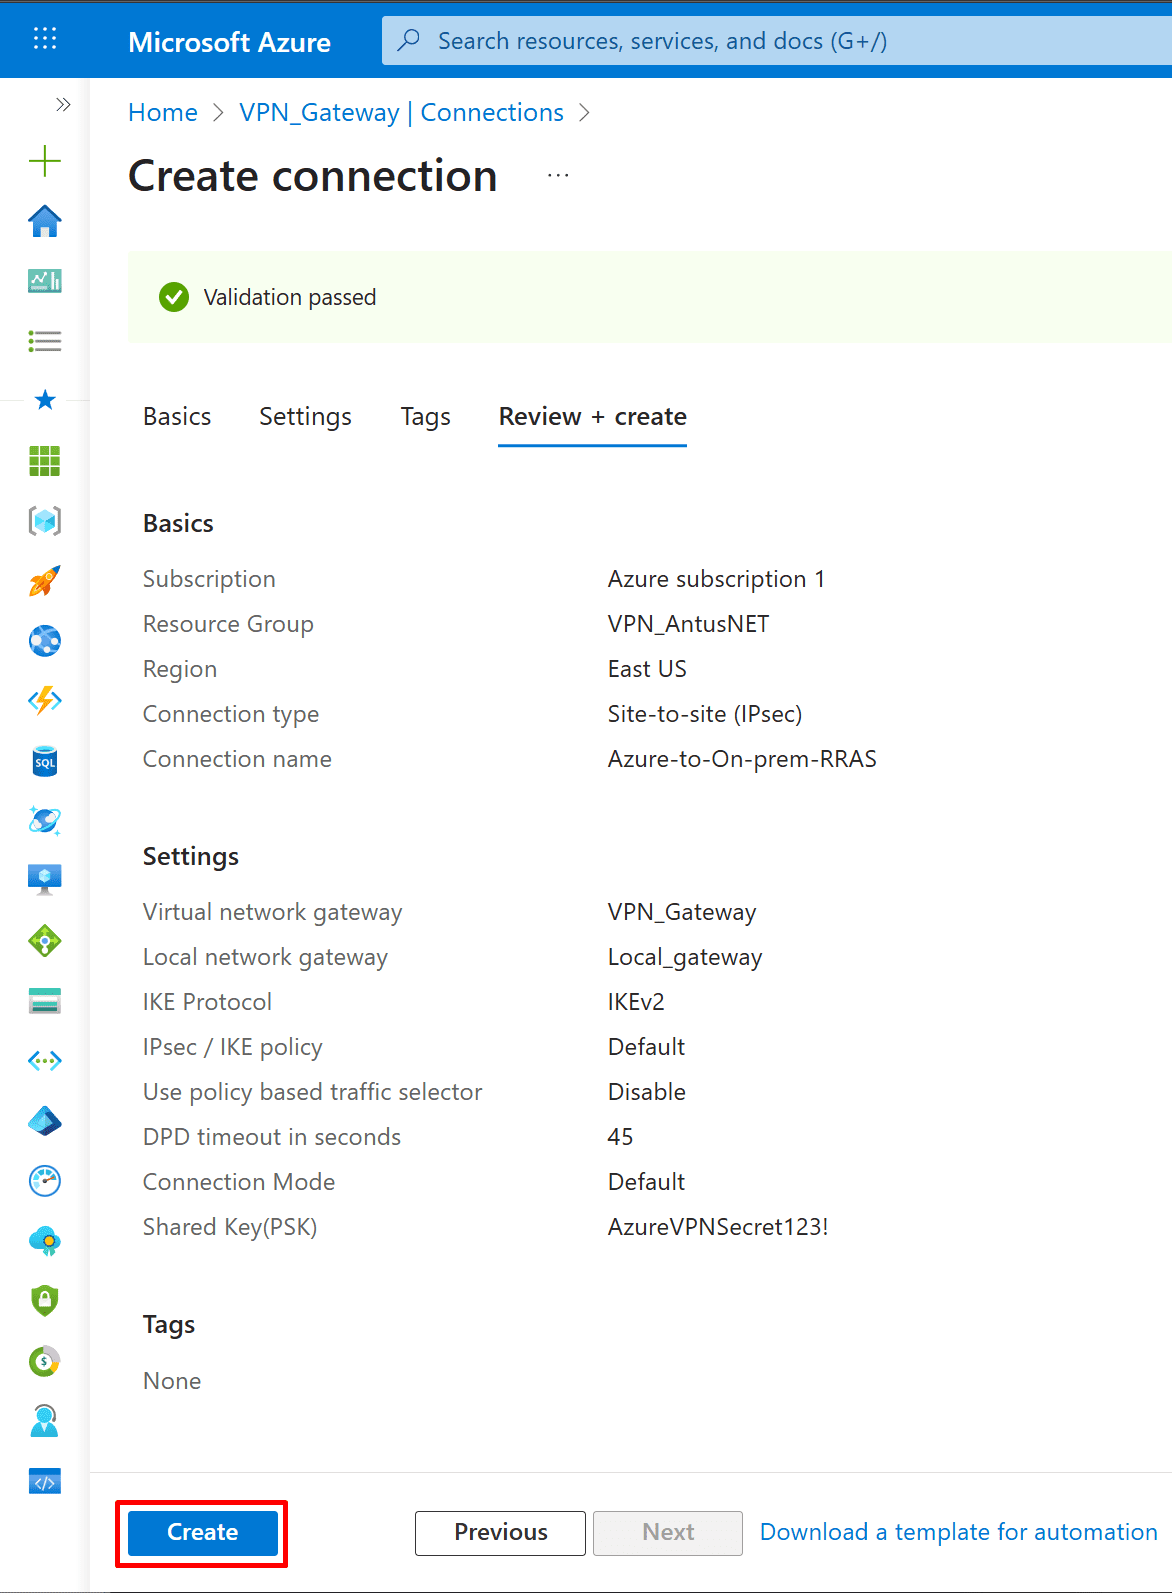
6. Configure the Site-to-Site VPN connection on the Azure Virtual Network Gateway using the same pre-shared key.
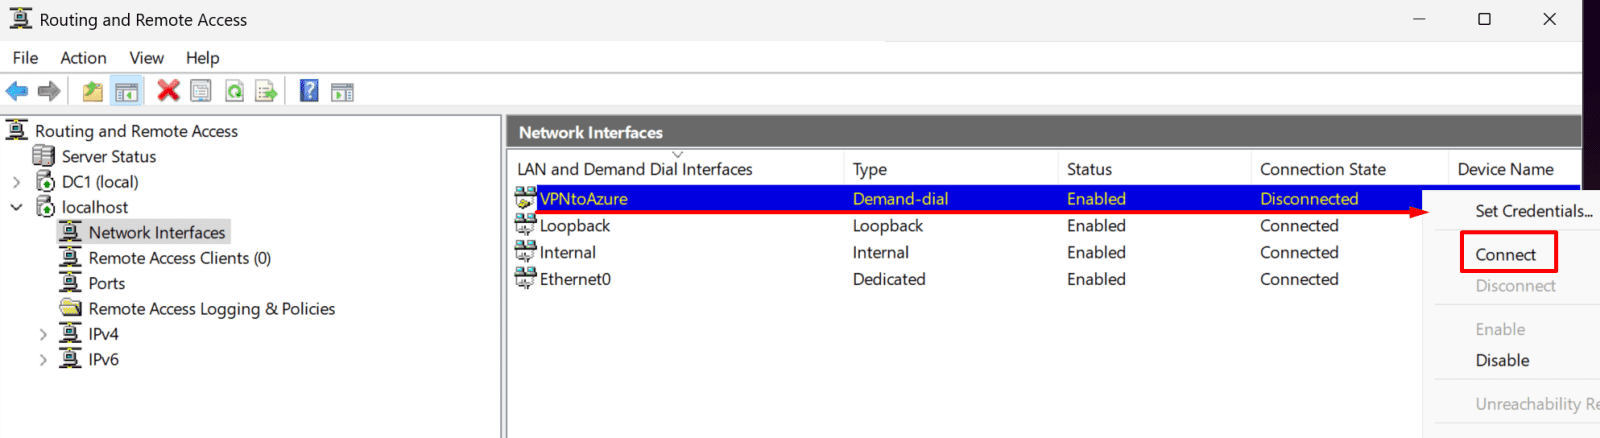
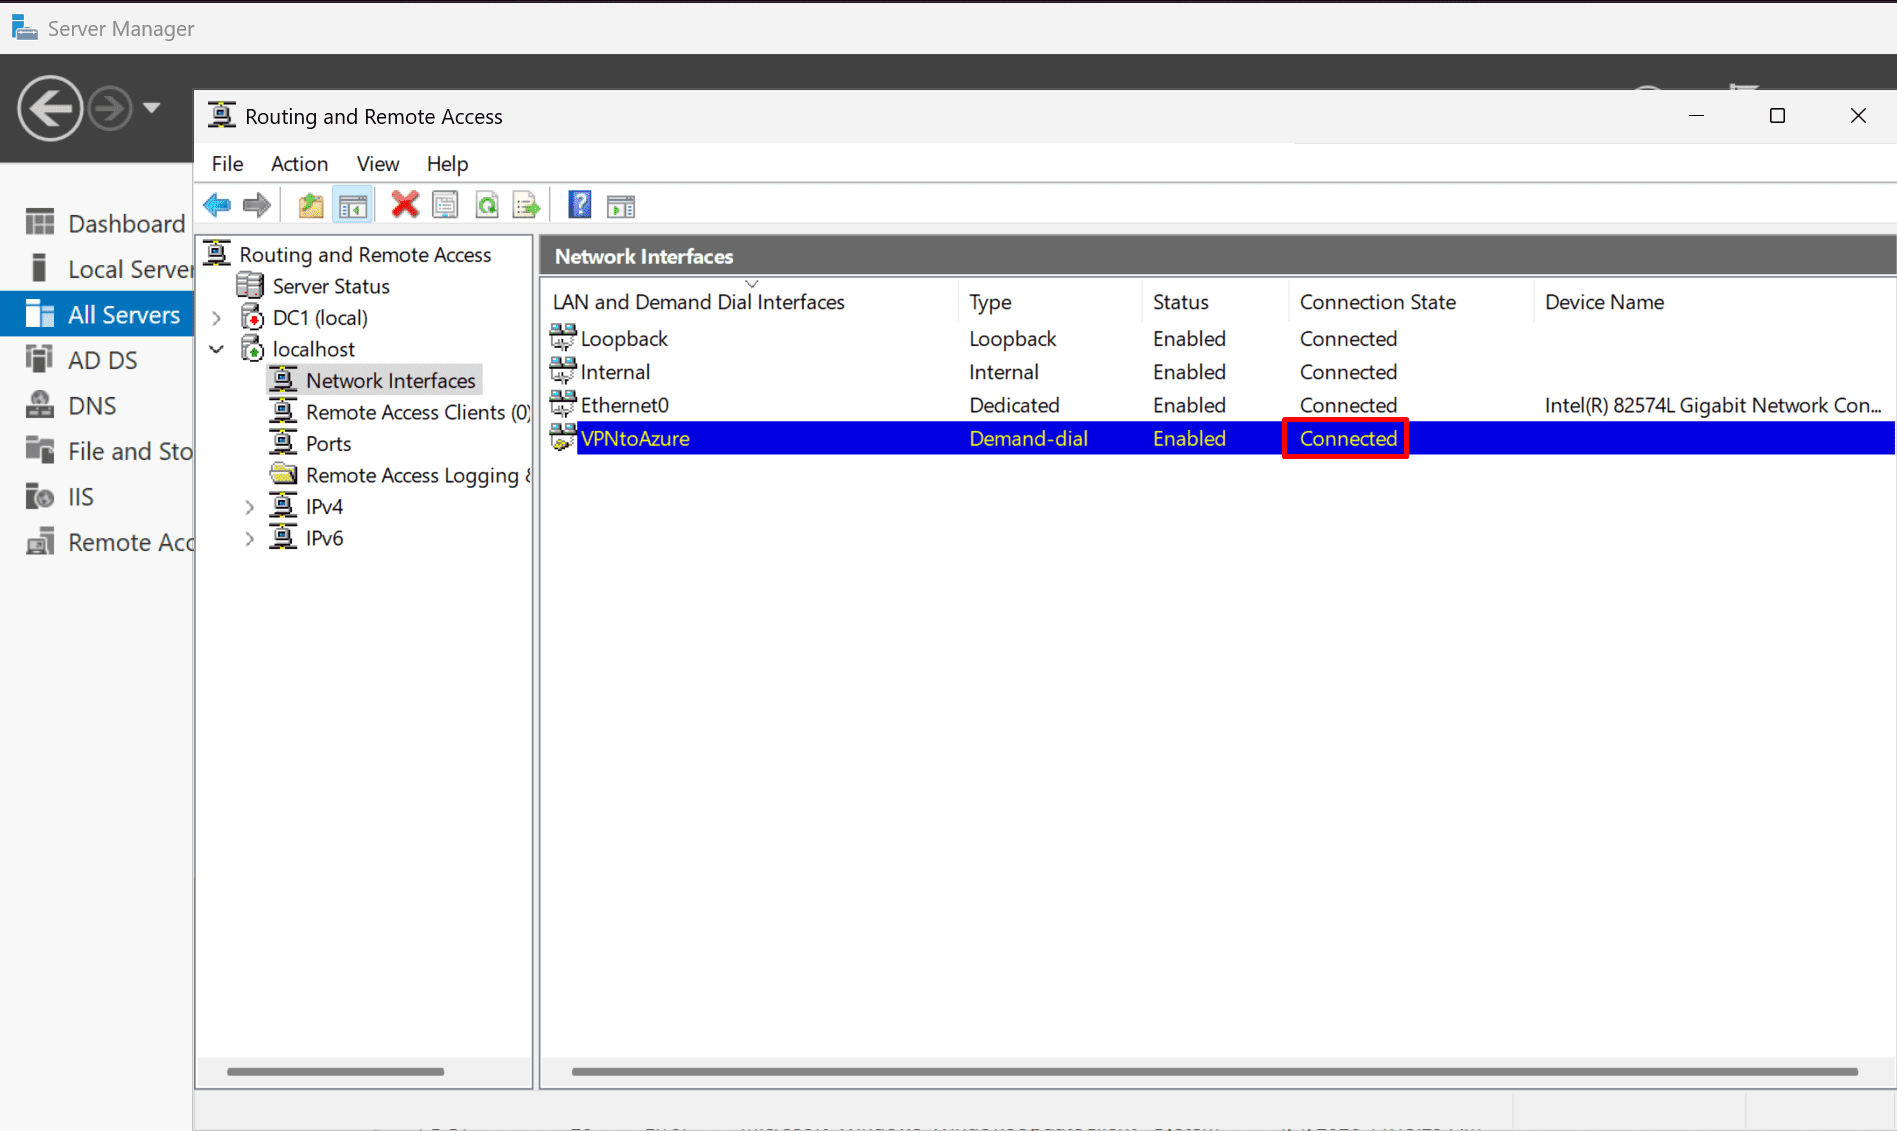
7. Validate Connectivity.
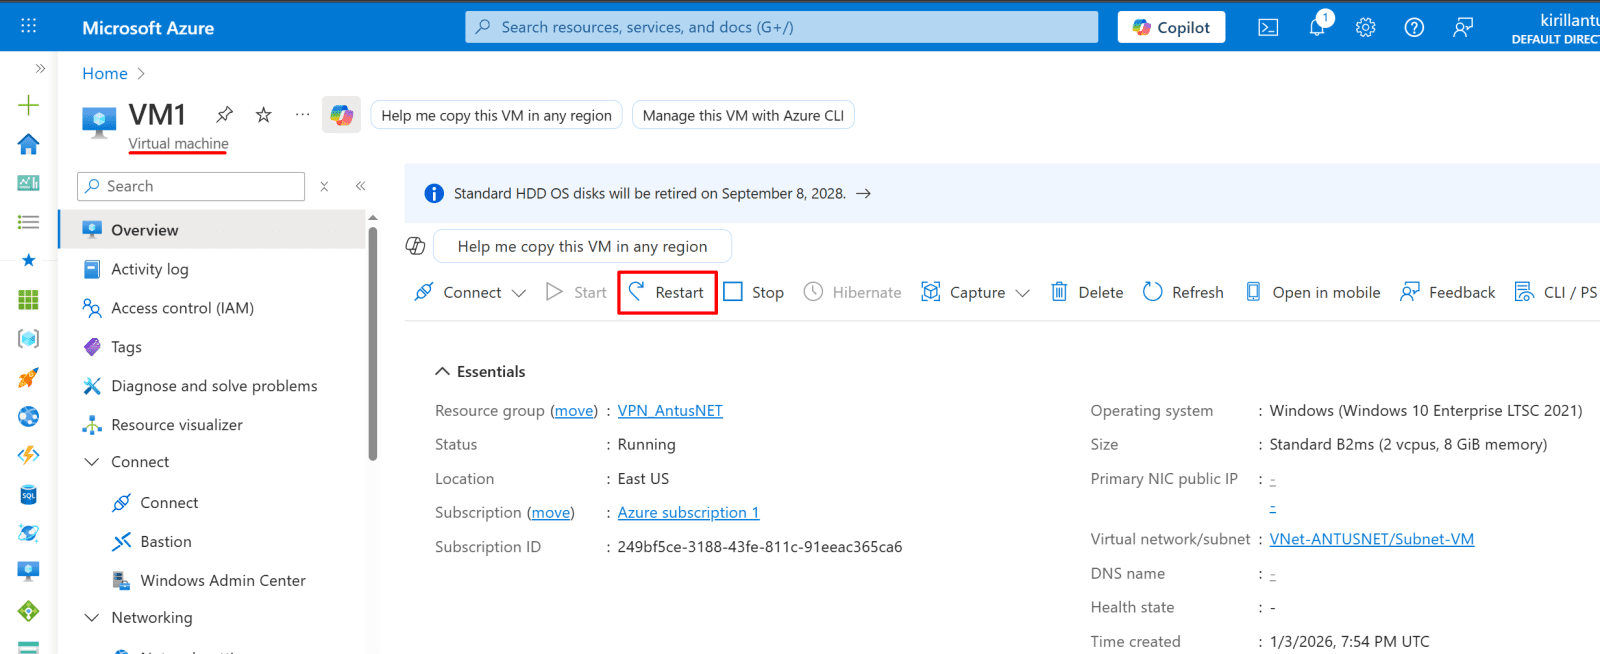
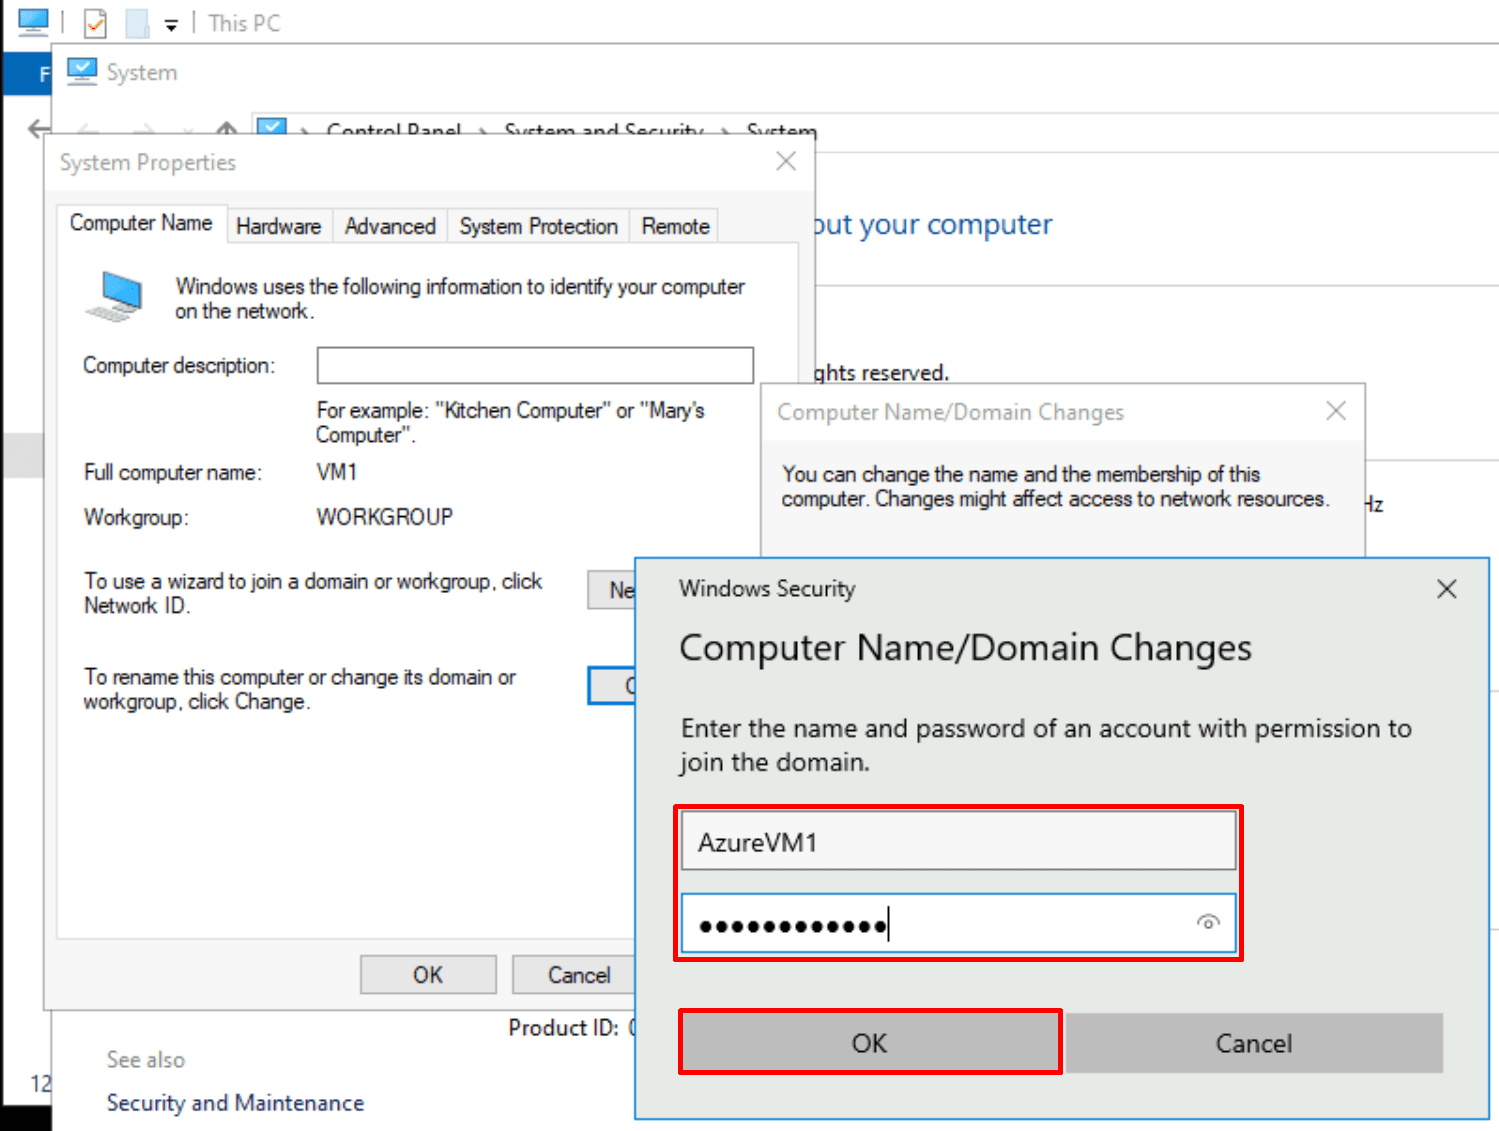
8. Join Azure VM to On-Premises Domain (DC01).
9. Optional: Extend Connectivity with VNet Peering.
*
Steps
Create an Azure Virtual Network (VNet).
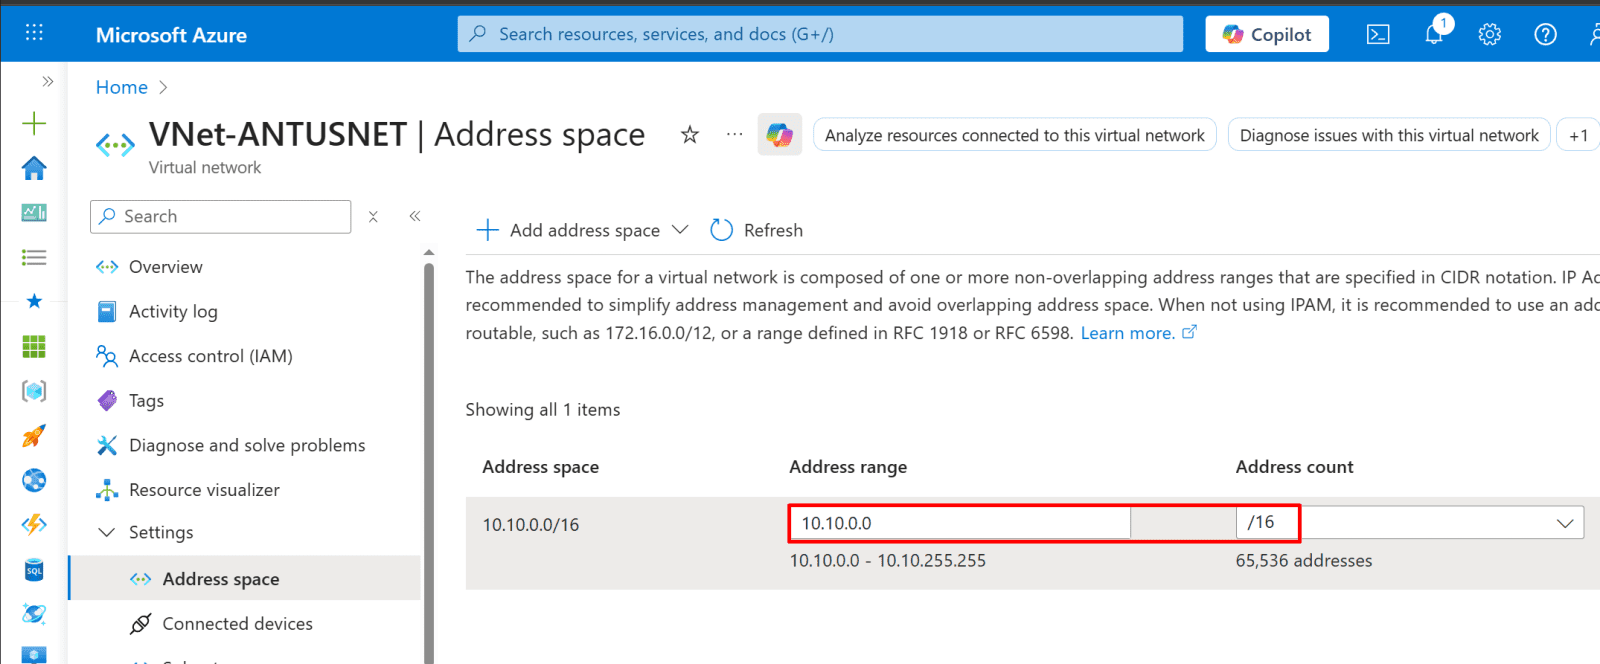
Set up an Azure Virtual Network (VNet) with a dedicated GatewaySubnet to prepare for the Site-to-Site VPN connection. Ensure that the VNet address space does not overlap with your on-premises network.
*
In this example, I will use an ARM JSON template for faster deployment.
1. Search for "Deploy a custom template."

*
2. Click on "Build your own template in the editor."
Paste the template code into the editor and click "Save."
Note: You can modify the configurable settings to match your environment.

*

*
3. Choose your subscription and resource group, then click "Review + Create."

*
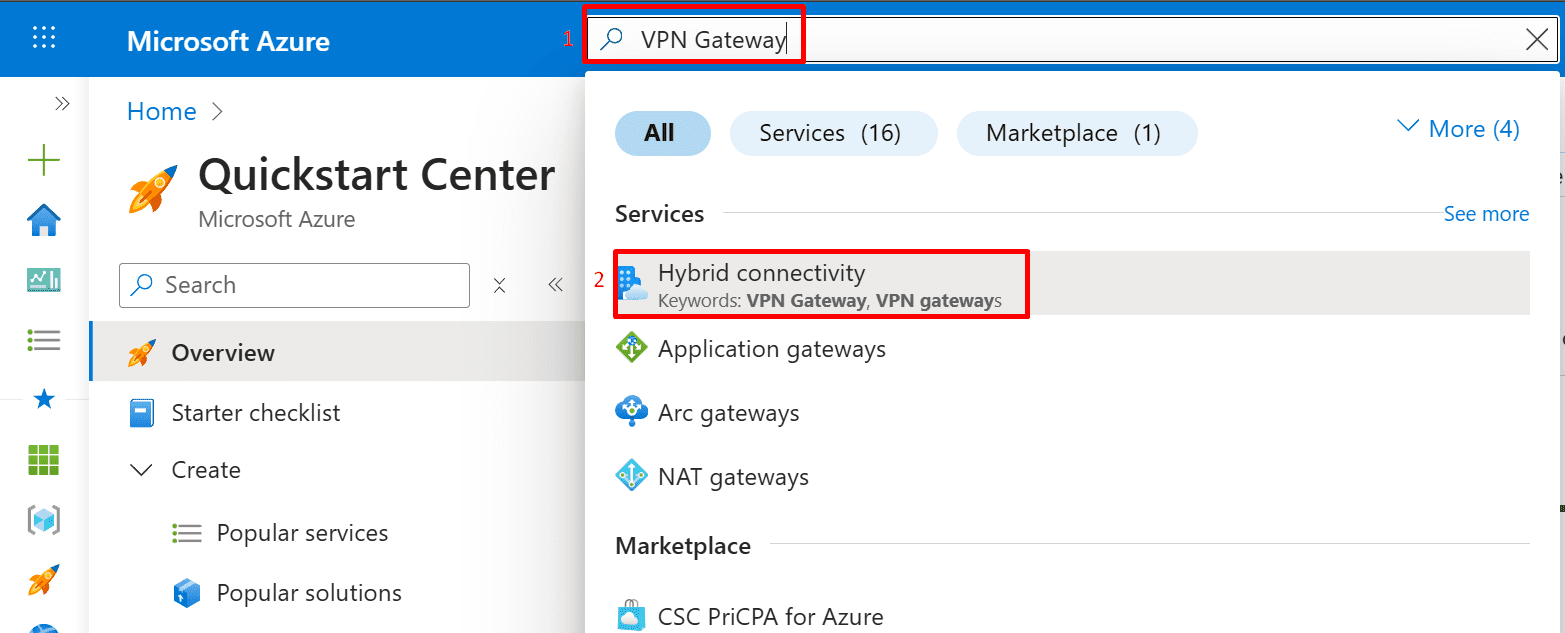
Deploy an Azure VPN Gateway.
The Azure VPN Gateway provides the Azure-side endpoint that establishes and manages the encrypted Site-to-Site VPN tunnel with the on-premises network.
1. Search for VPN Gateway, then select Hybrid connectivity from the results.
*
2. Select Set up VPN gateway.

*
3. Select Create to create the VPN gateway.

*
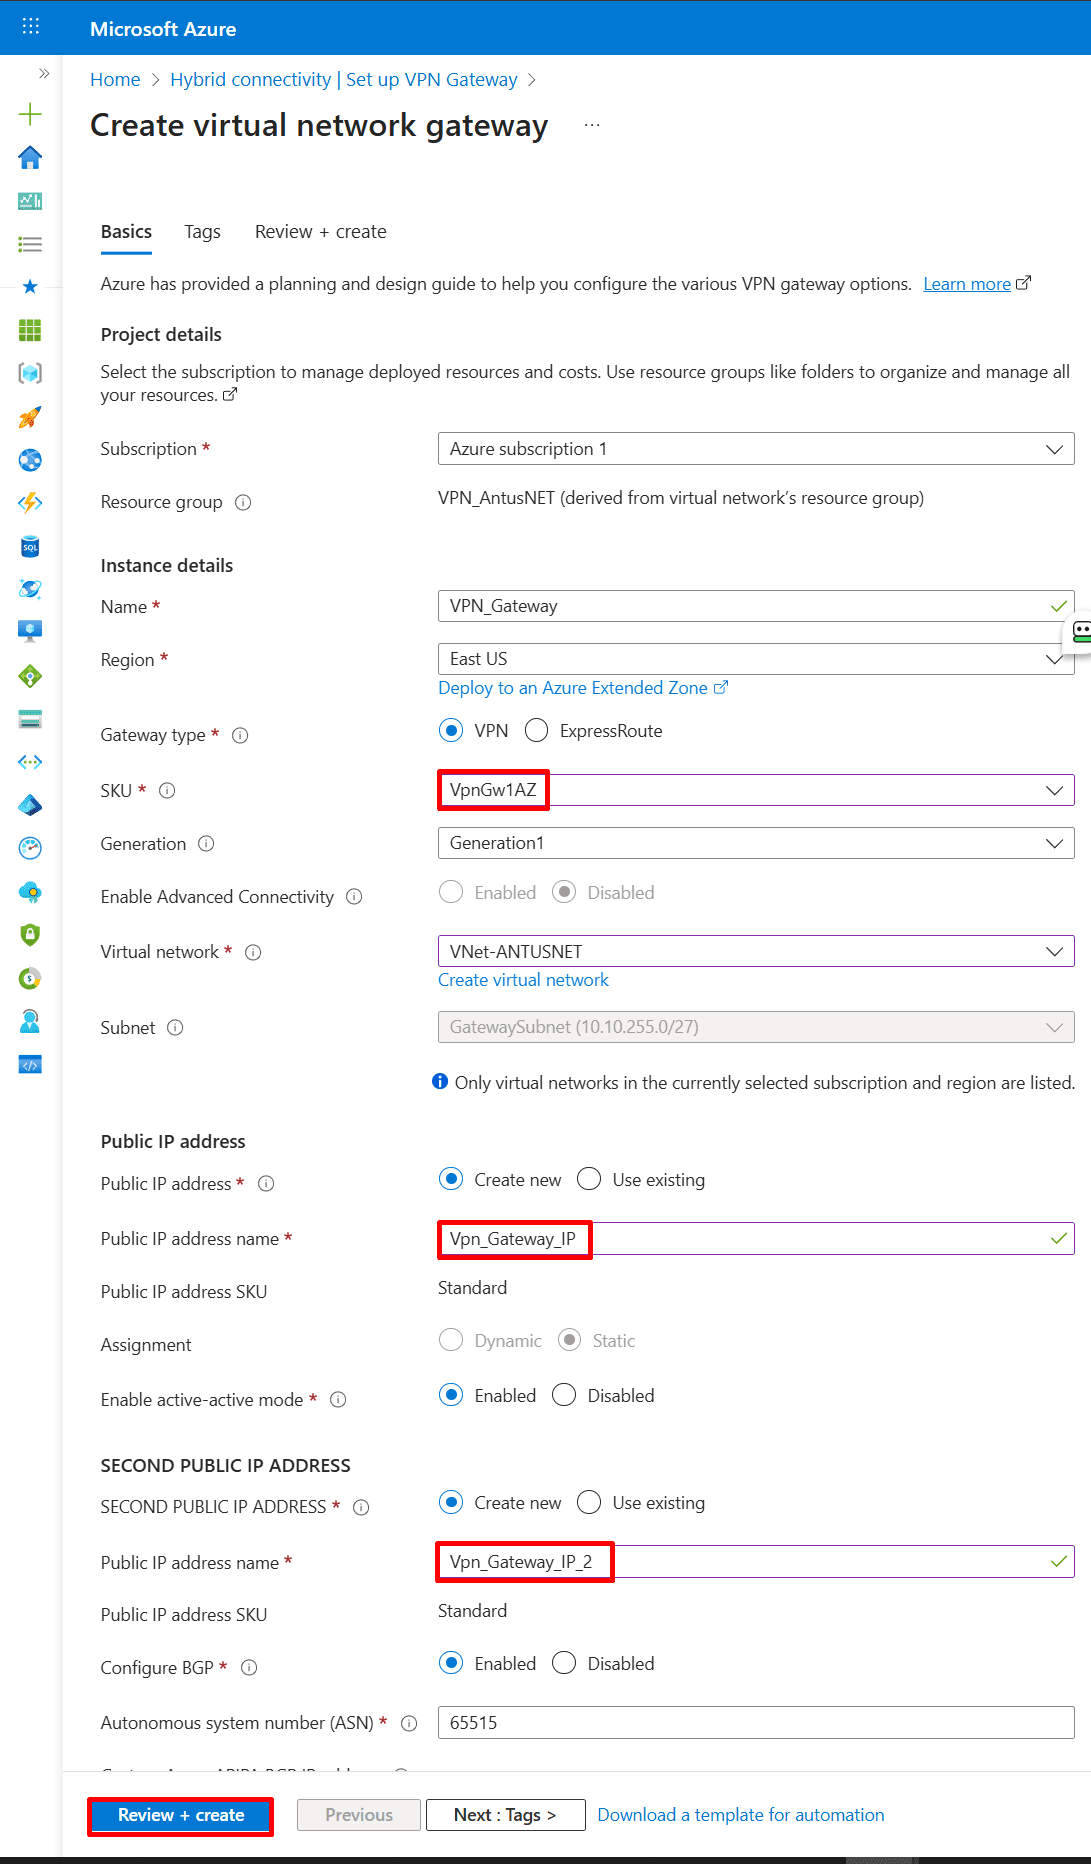
4. Fill in the required details on the Basics page.
Configure the Name, SKU, and other required settings according to your environment.
Note: Azure Key Vault access is not required for Virtual Network Gateways. Site-to-site VPN authentication uses IPsec/IKE pre-shared keys and does not integrate with Azure Key Vault.
*

*
Create a local network gateway.
The Local Network Gateway represents your on-premises network in Azure. It defines the on-premises public IP address and address space so Azure knows where to send VPN traffic and how to route it correctly.
1. Go to "Hybrid connectivity" and create a local network gateway.

*
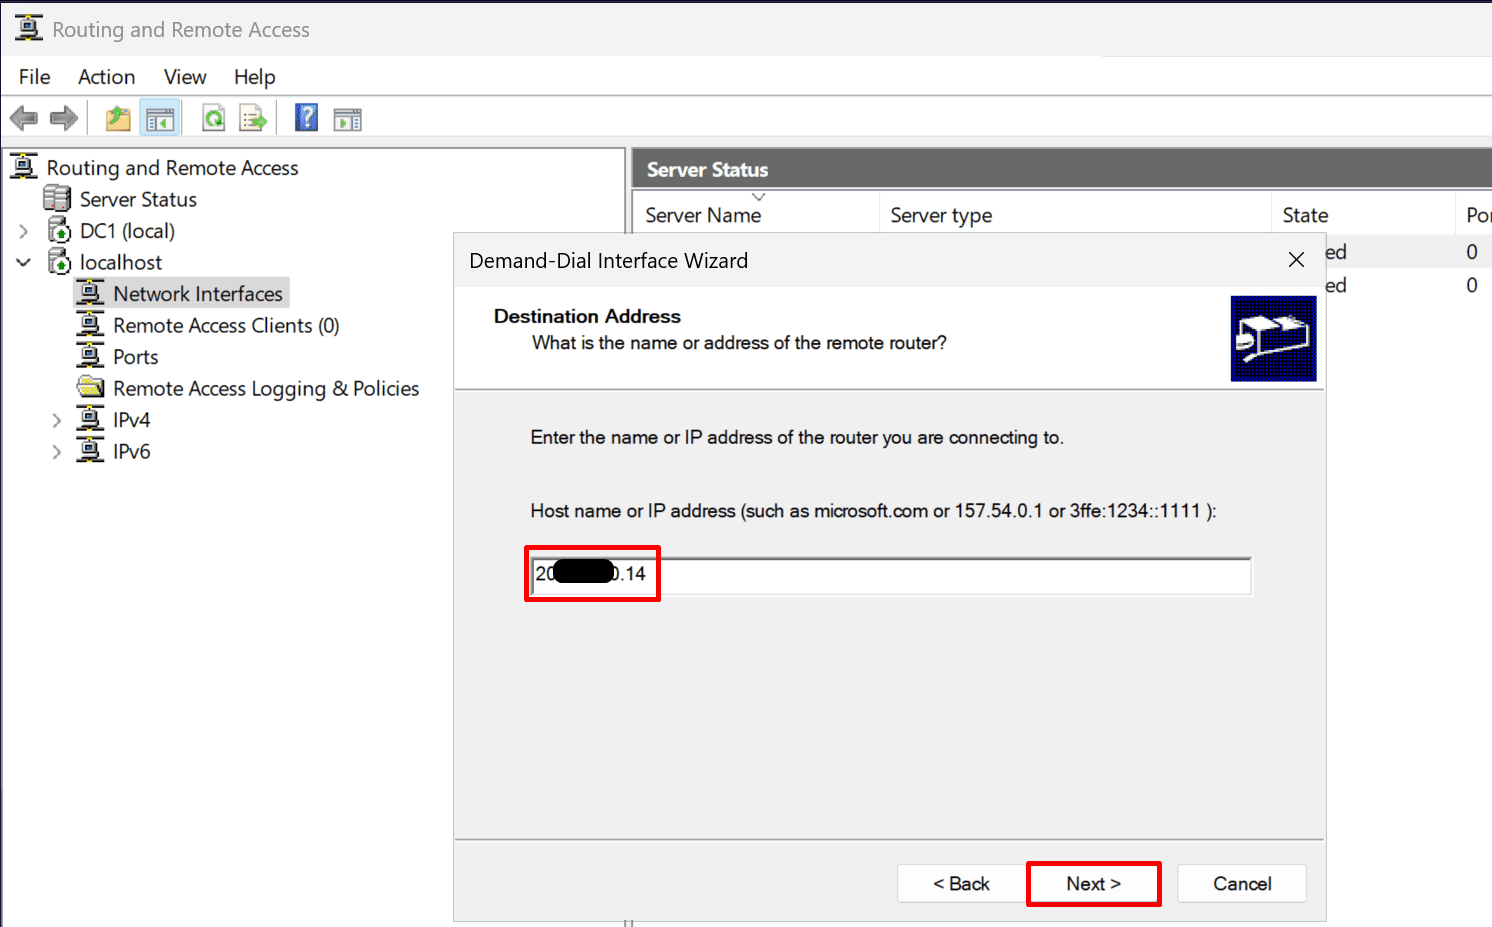
2. Enter your details, including the public IP of your home router or firewall, and the subnet address space of your domain.
Note: For a basic Azure Site-to-Site VPN with a Windows Server RRAS on-premises, you do NOT need to configure BGP.
BGP (Border Gateway Protocol) is only required if you want dynamic routing, where routes are automatically learned between Azure and your on-prem network. For most home/lab setups with static IPs and small networks, static routes are enough.

*
3. Click Create.

*
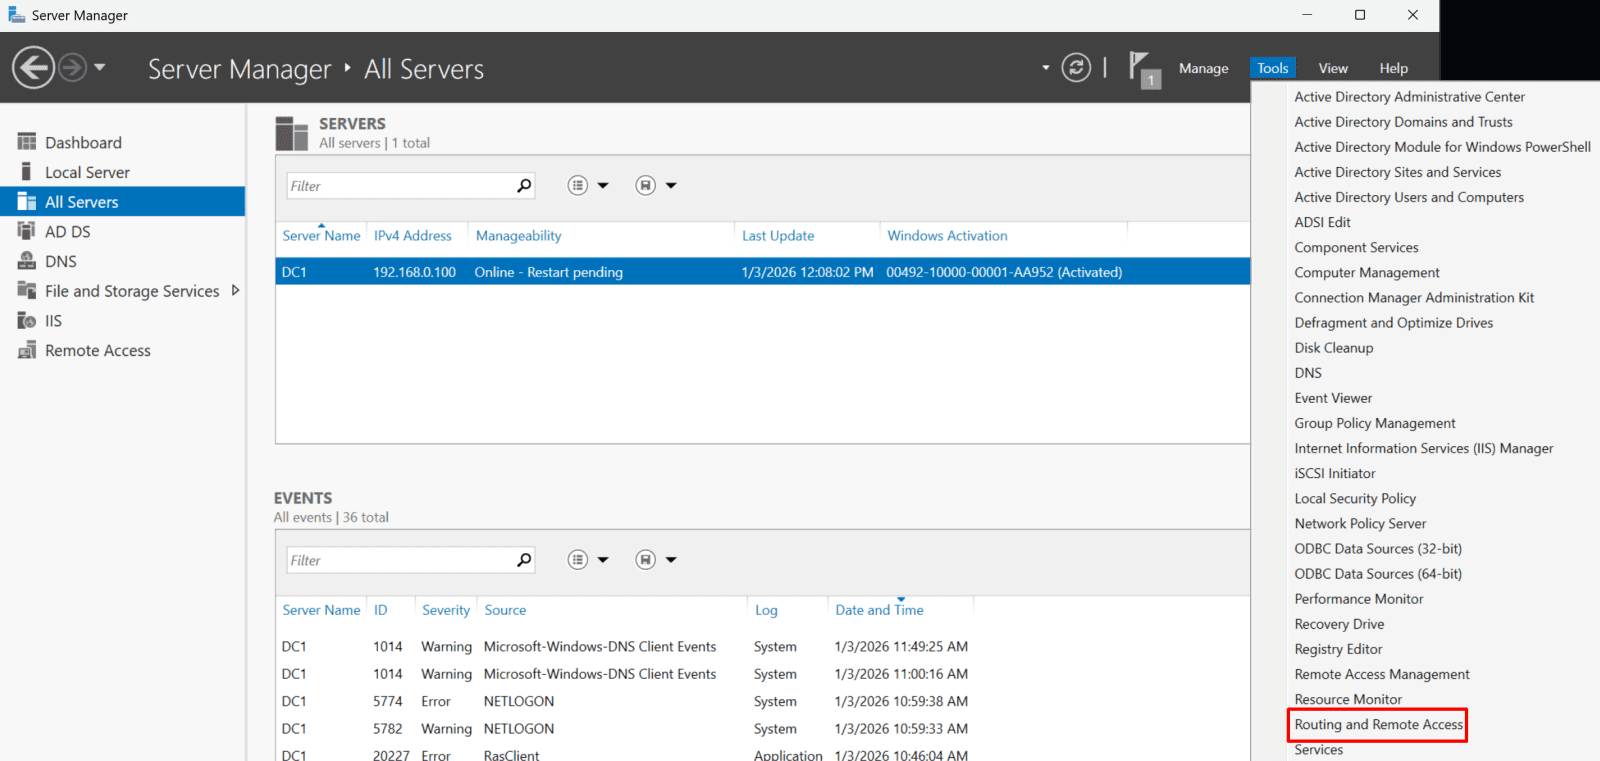
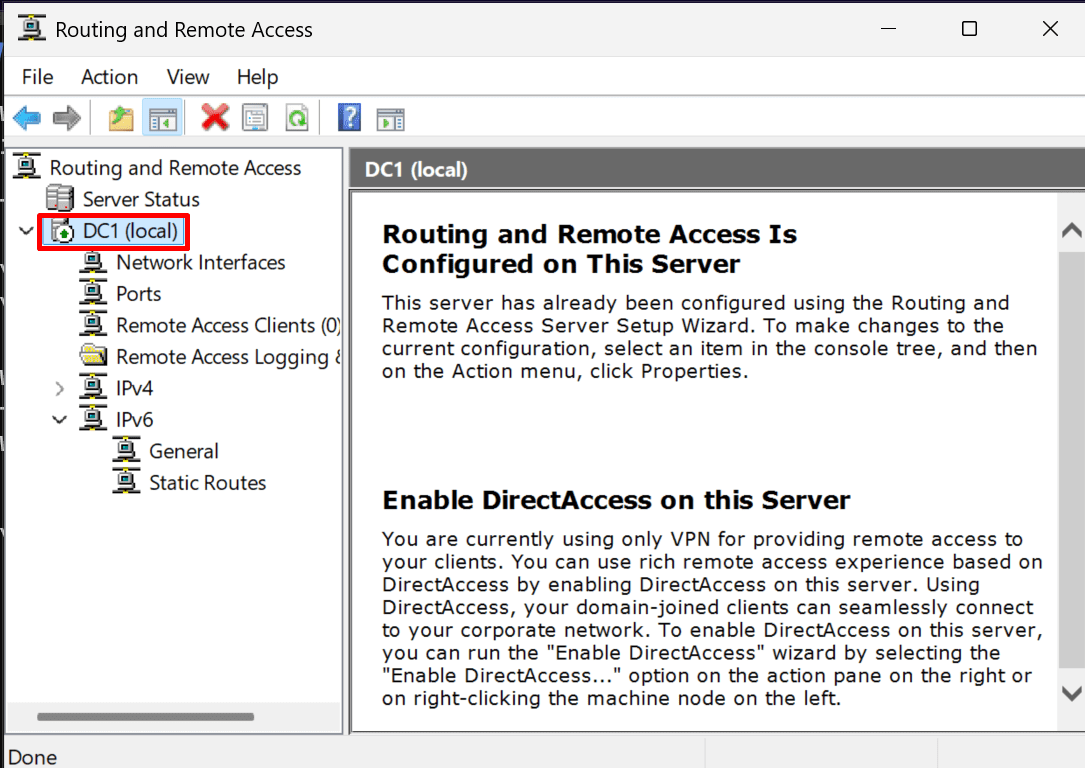
Configure the on-premises VPN device with Windows Server RRAS.
Windows Server RRAS acts as the on-premises VPN endpoint, establishing and maintaining the secure site-to-site tunnel with Azure.
1. Log in to your on-premises Windows Server (this will act as your VPN device).
Important: You MUST be logged in as a domain administrator.
- Open Server Manager → Add Roles and Features.
- Choose Role-based or feature-based installation → Select your server.
- Under Roles, check Remote Access → Next.
- Under Role Services, select Remote Access.

*
2. Click Next three times and check:
- DirectAccess and VPN (RAS)
- Routing
- Click next four times.