This guide provides a practical, hands-on walkthrough for securing a local AI deployment on Ubuntu Server integrated with a Windows Active Directory environment.

*
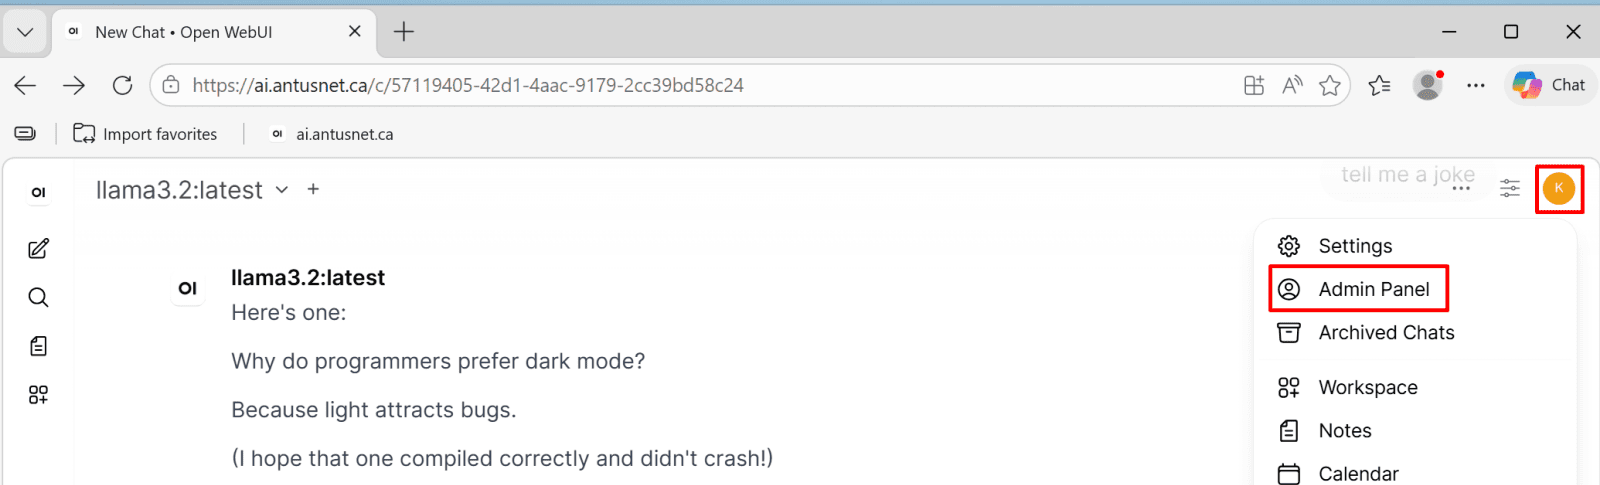
Enterprise AI & LLM Security Hardening Guide - Introduction
*
AI is moving fast. Organizations are deploying local LLMs - Ollama, vLLM, LM Studio - directly on internal infrastructure, often without the security controls they'd apply to any other network service. The result is a growing attack surface that most security teams haven't caught up to yet.
This guide exists to close that gap.
What you'll find here is a practical, end-to-end walkthrough for hardening a local AI deployment on Ubuntu Server, integrated into a Windows Active Directory environment. Every step has been tested in a real lab. No theory-only recommendations - every control shown is one you can implement today.
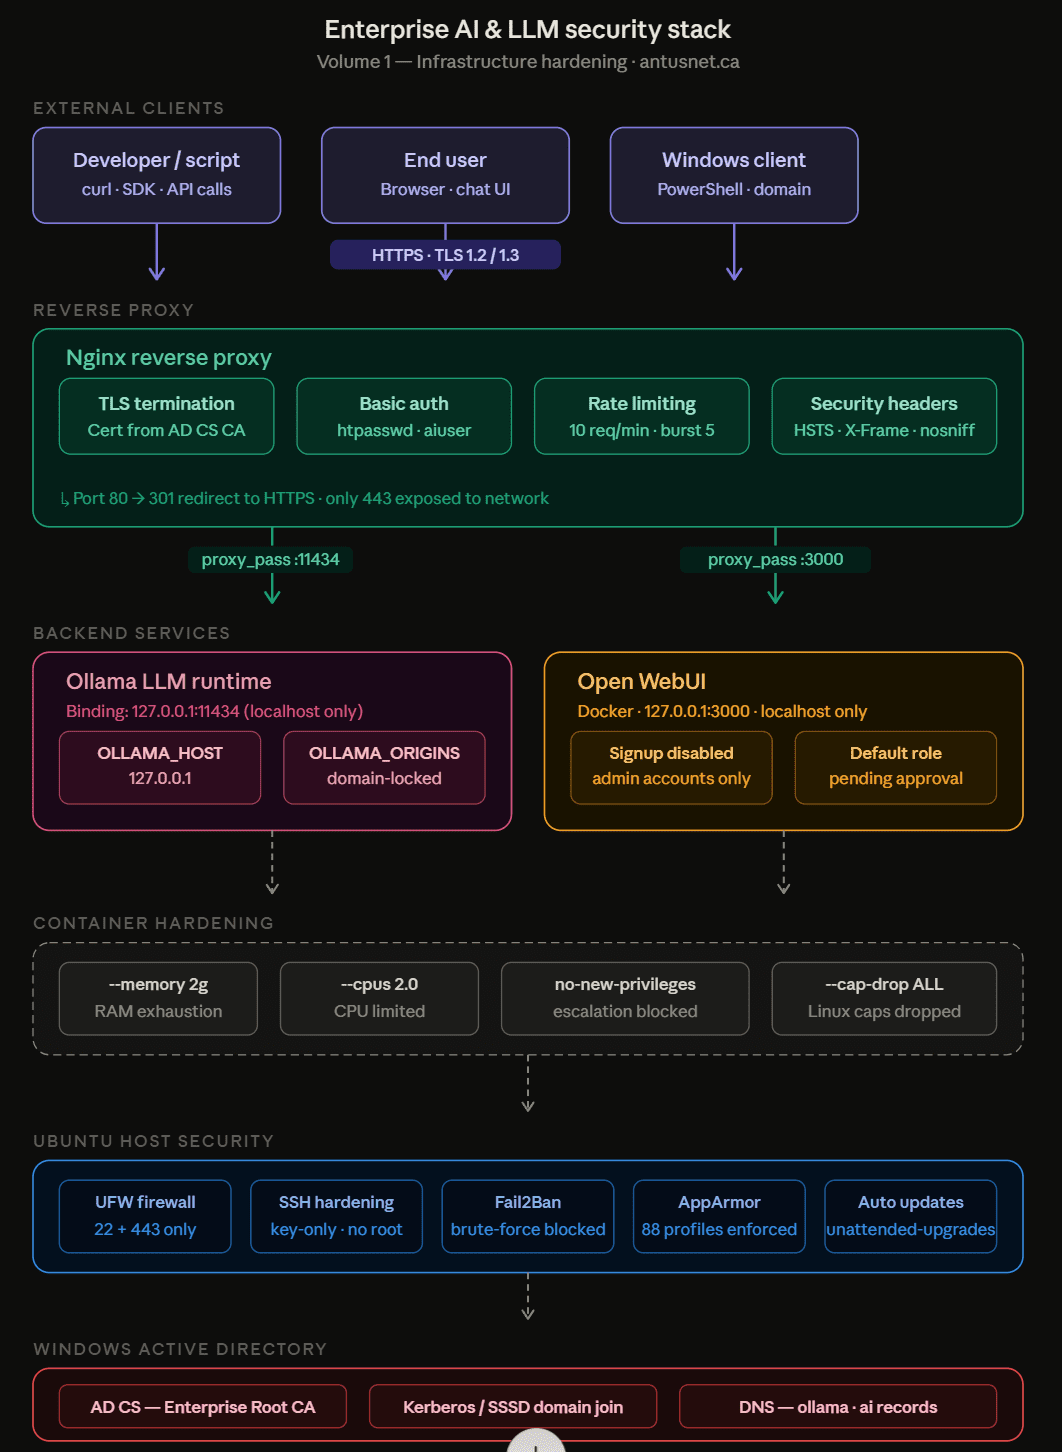
What this volume covers:
- Securing the Ubuntu host: system updates, UFW firewall, SSH hardening, Fail2Ban brute-force protection, and AppArmor mandatory access control
- Ollama installation and hardening: localhost-only binding, CORS lockdown, model allow-listing, and request timeout controls
- Joining Ubuntu to a Windows domain via Kerberos and SSSD
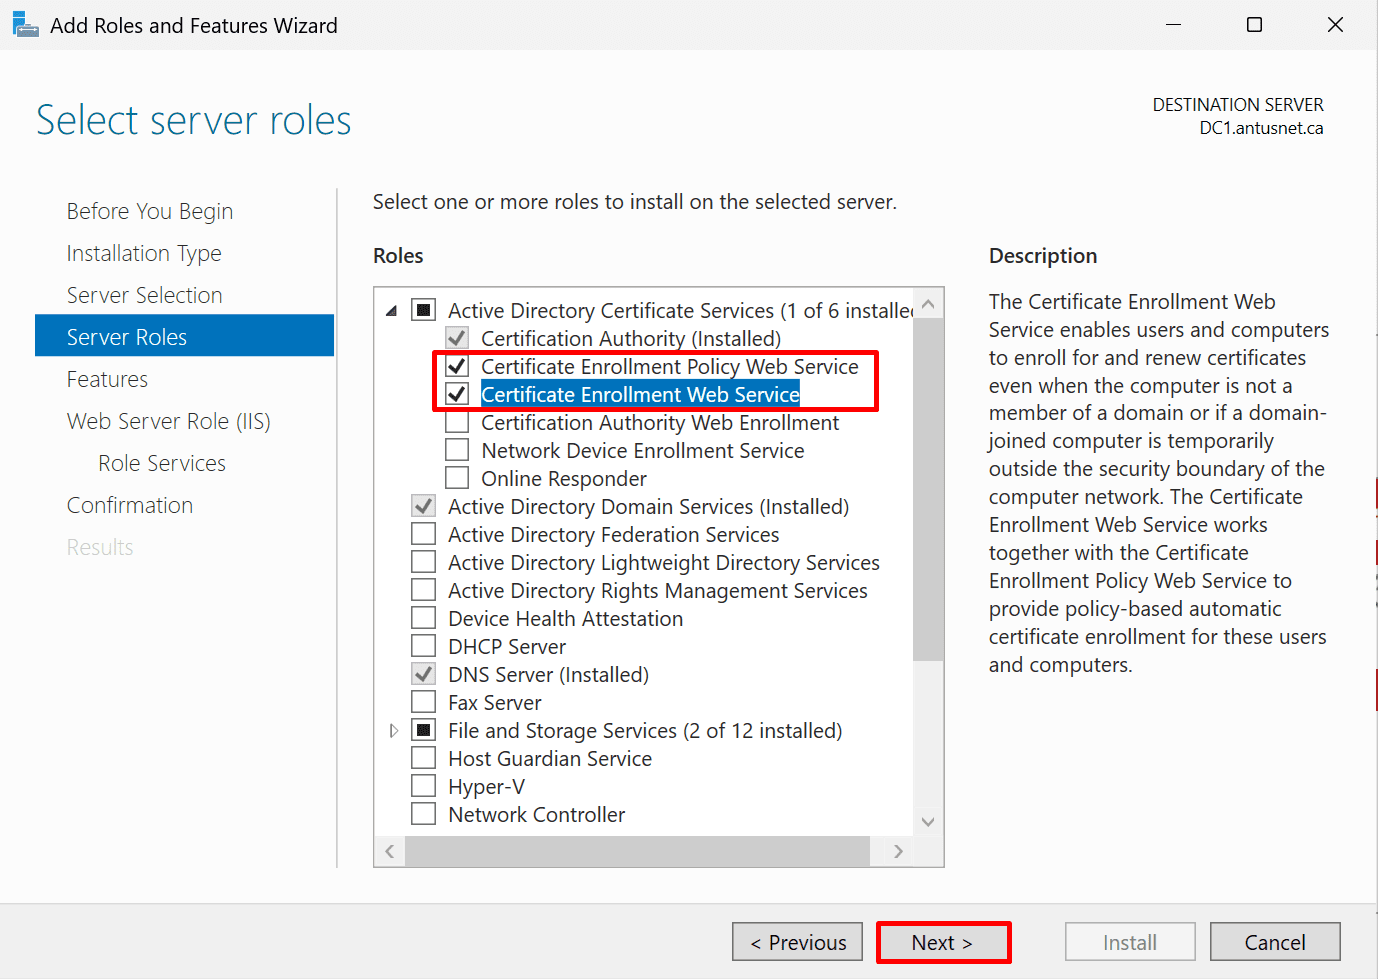
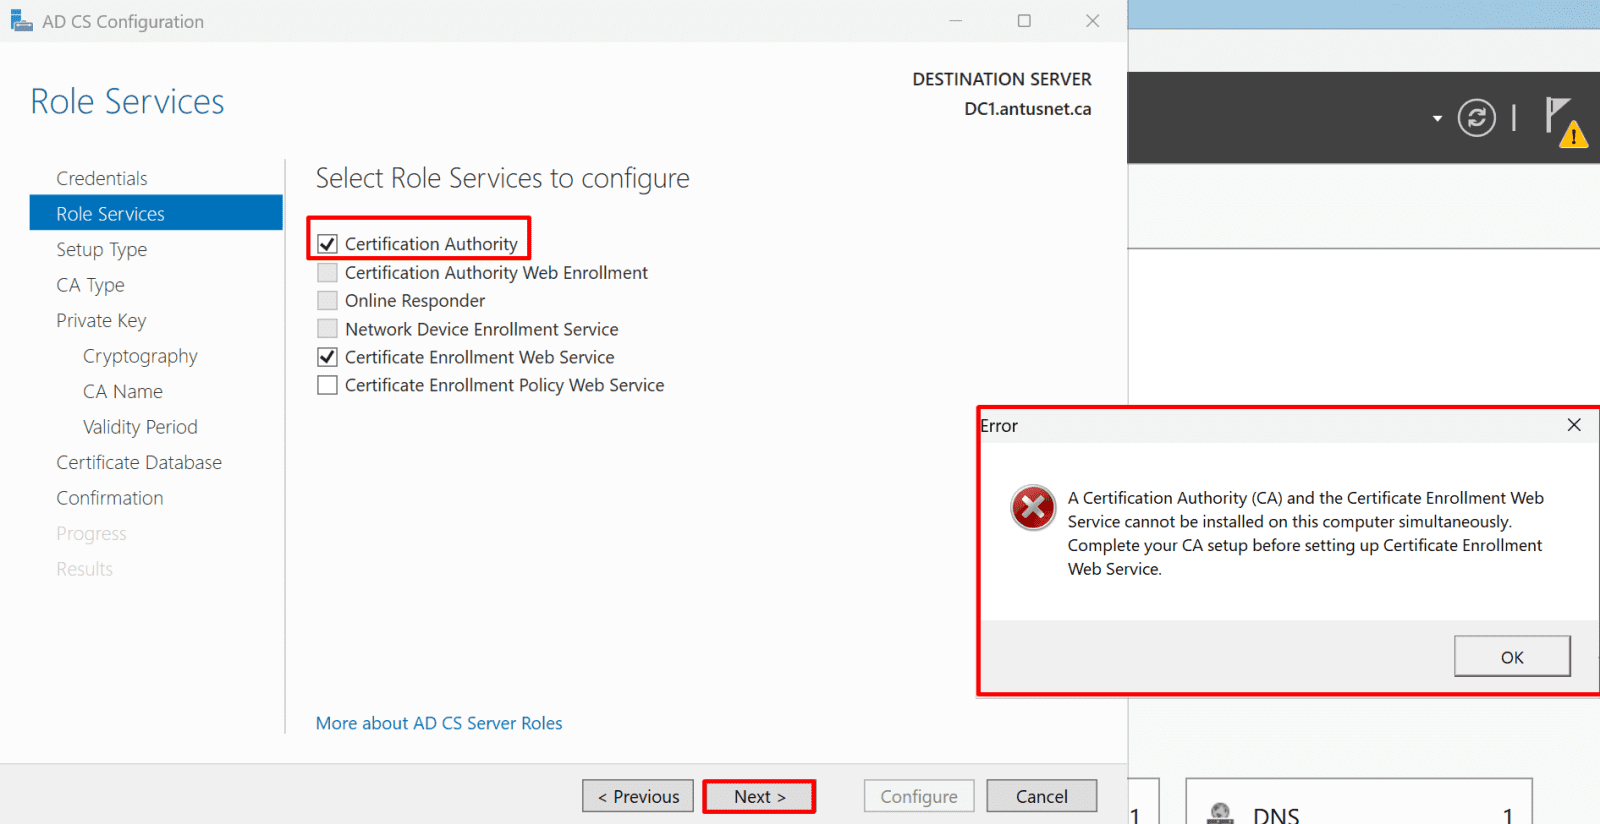
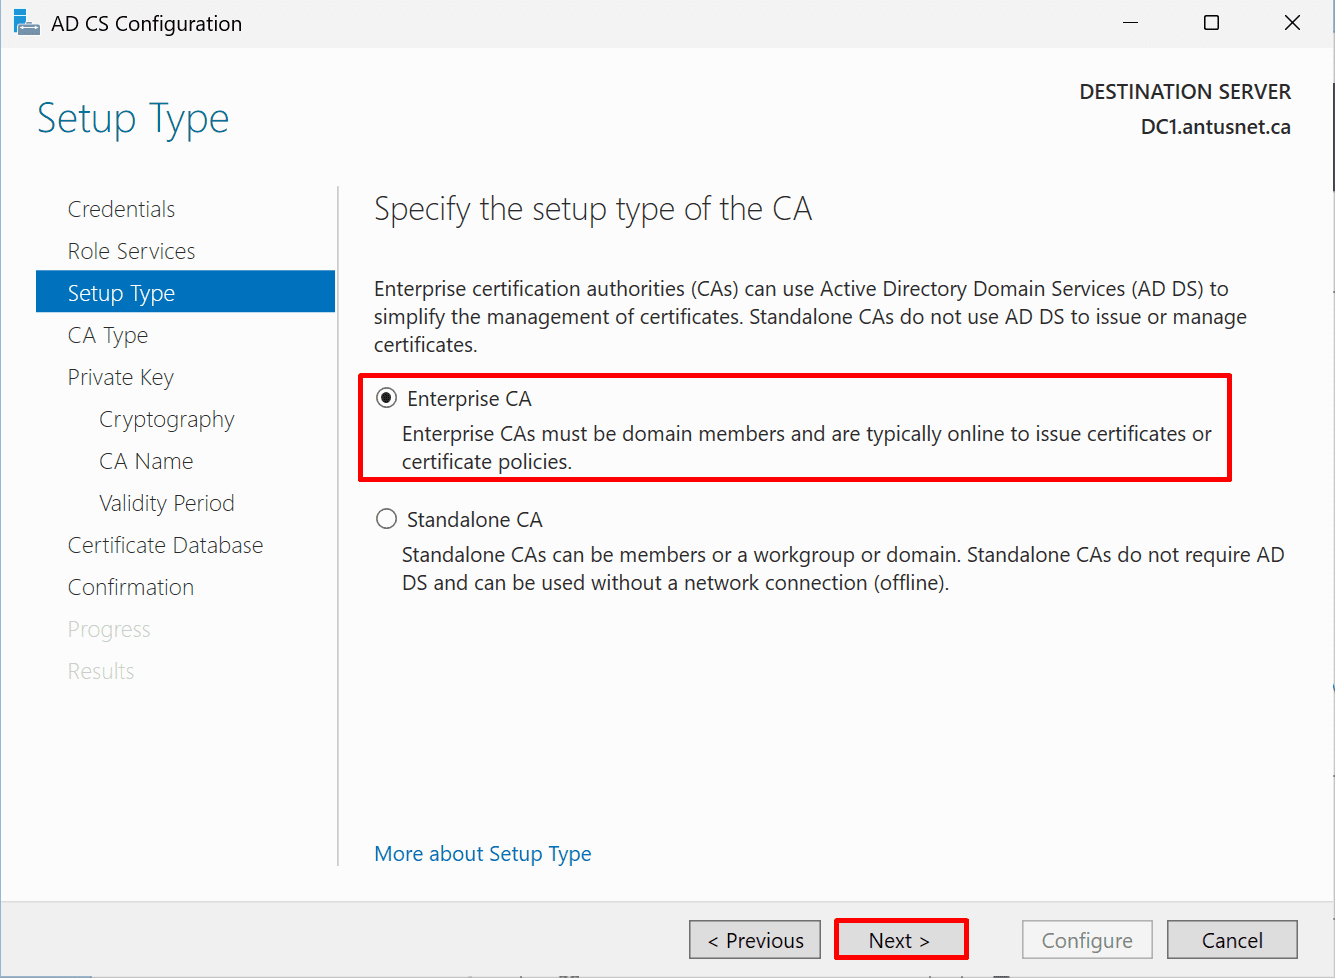
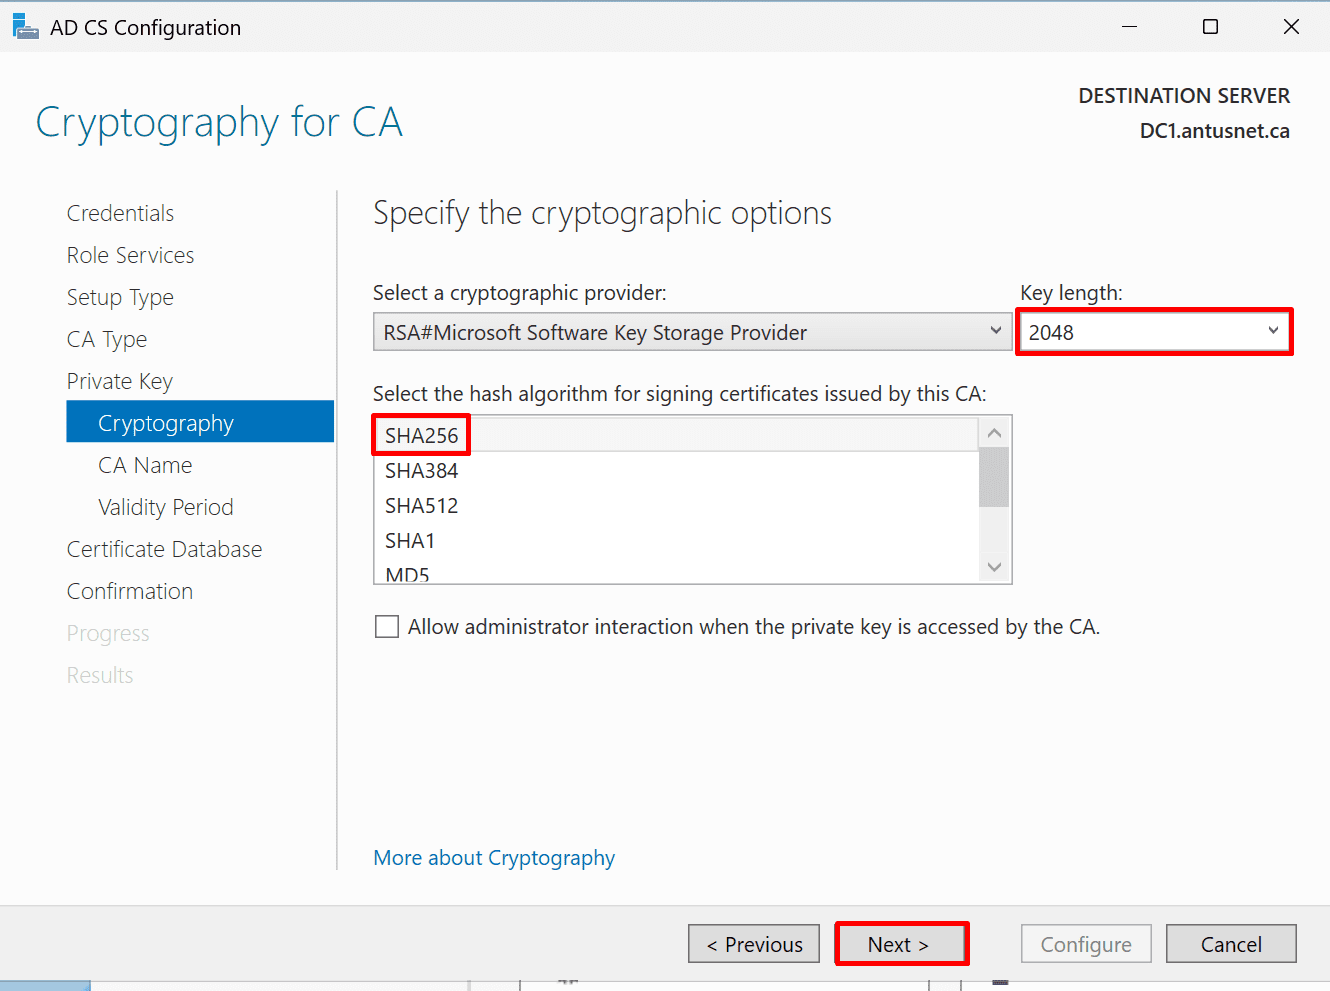
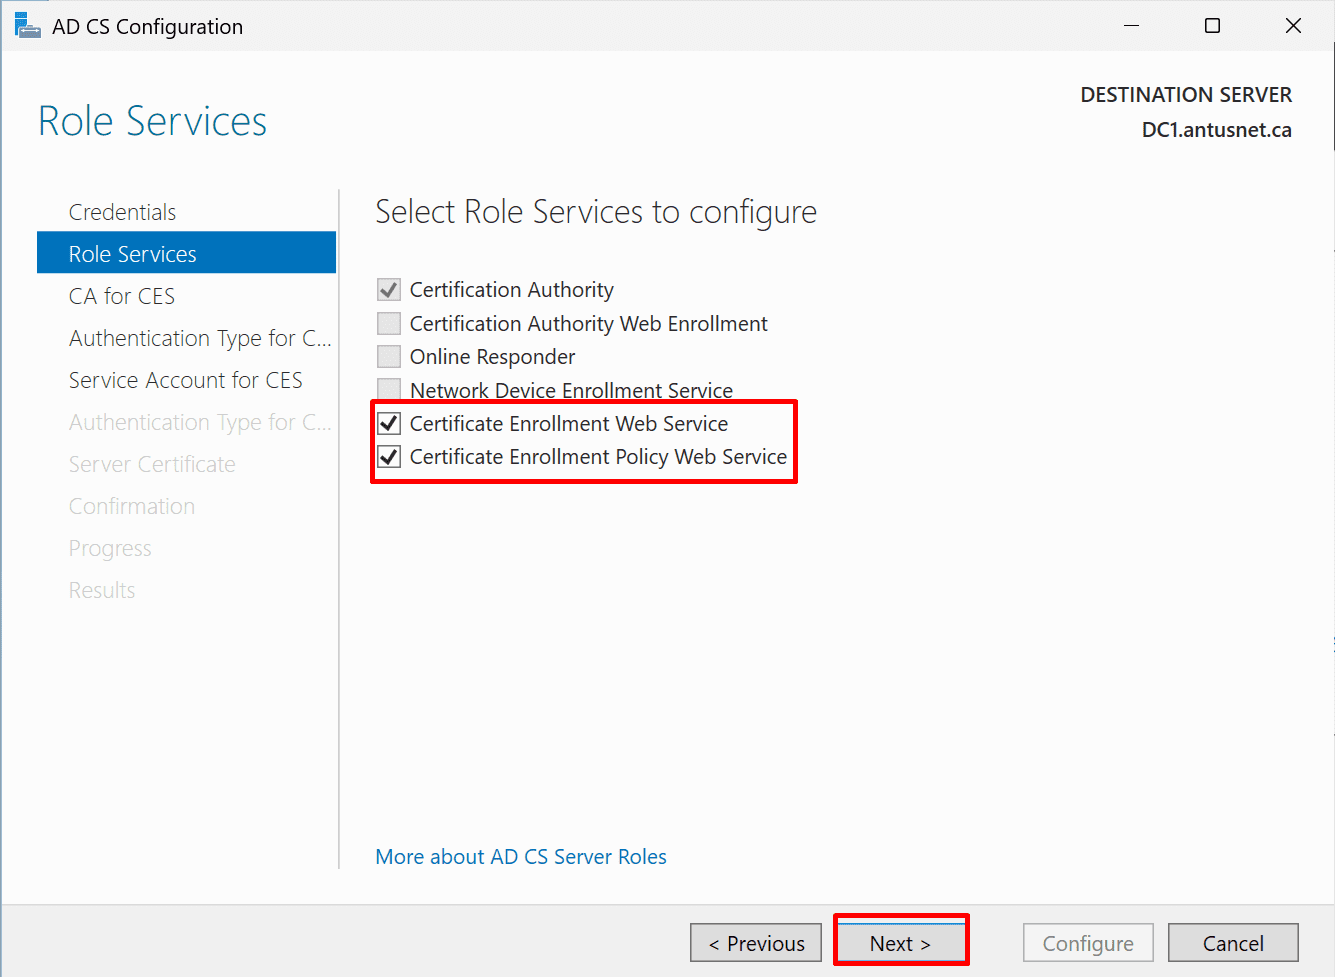
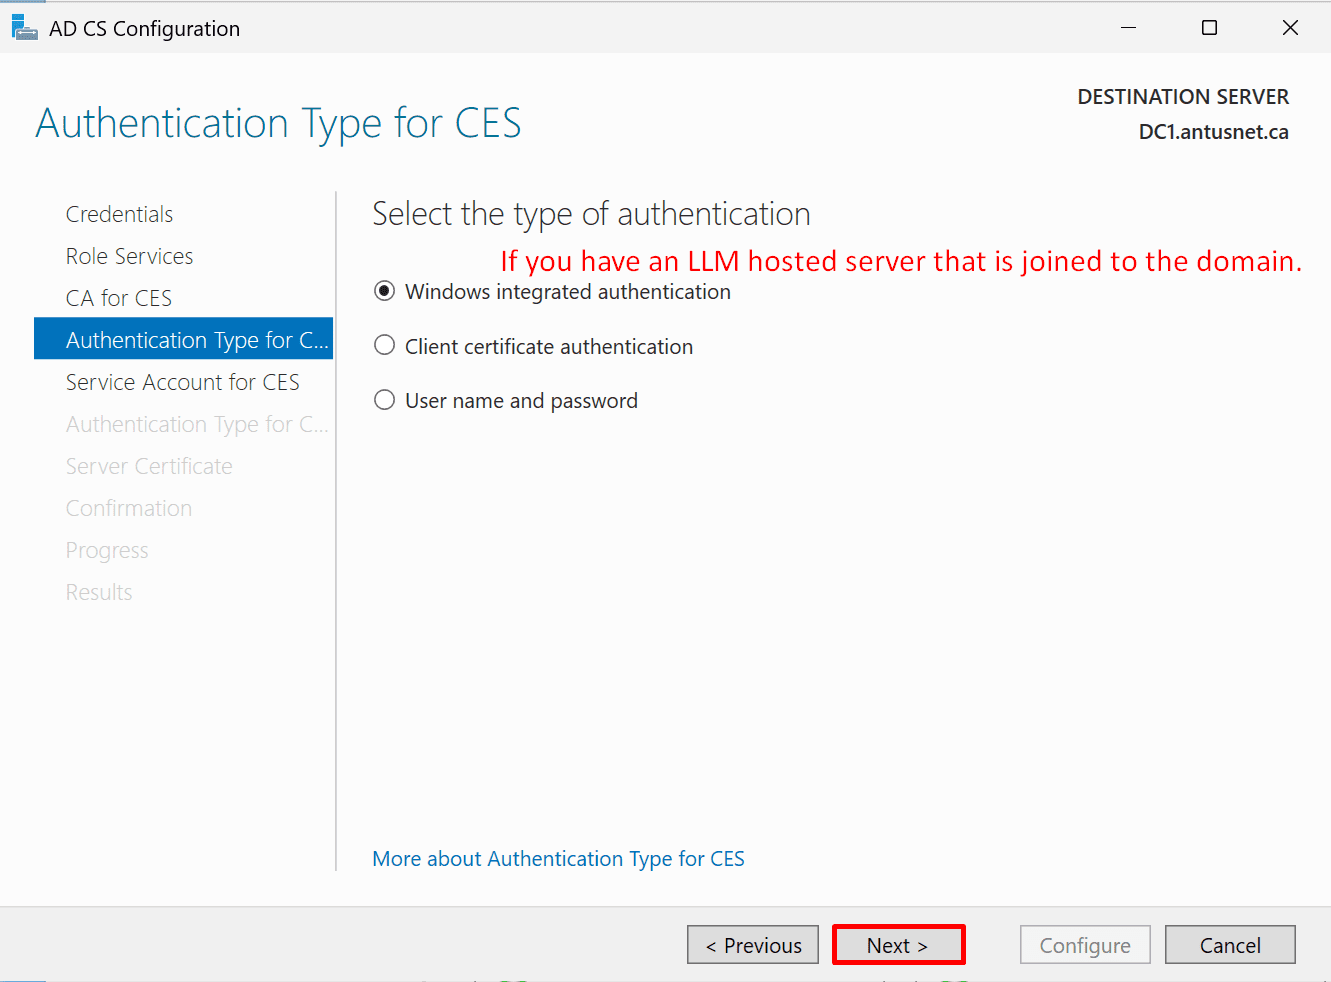
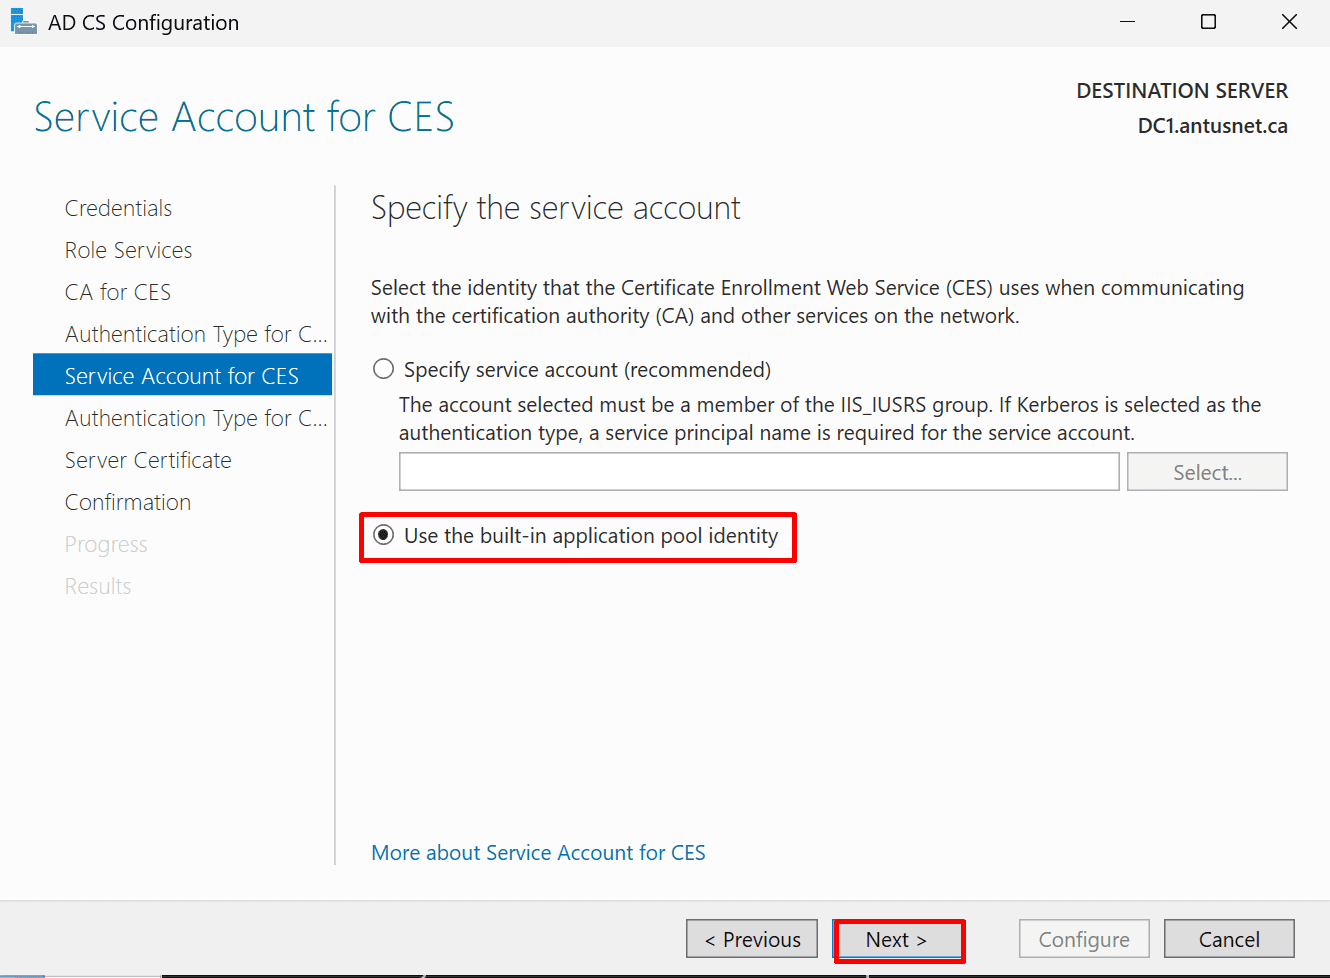
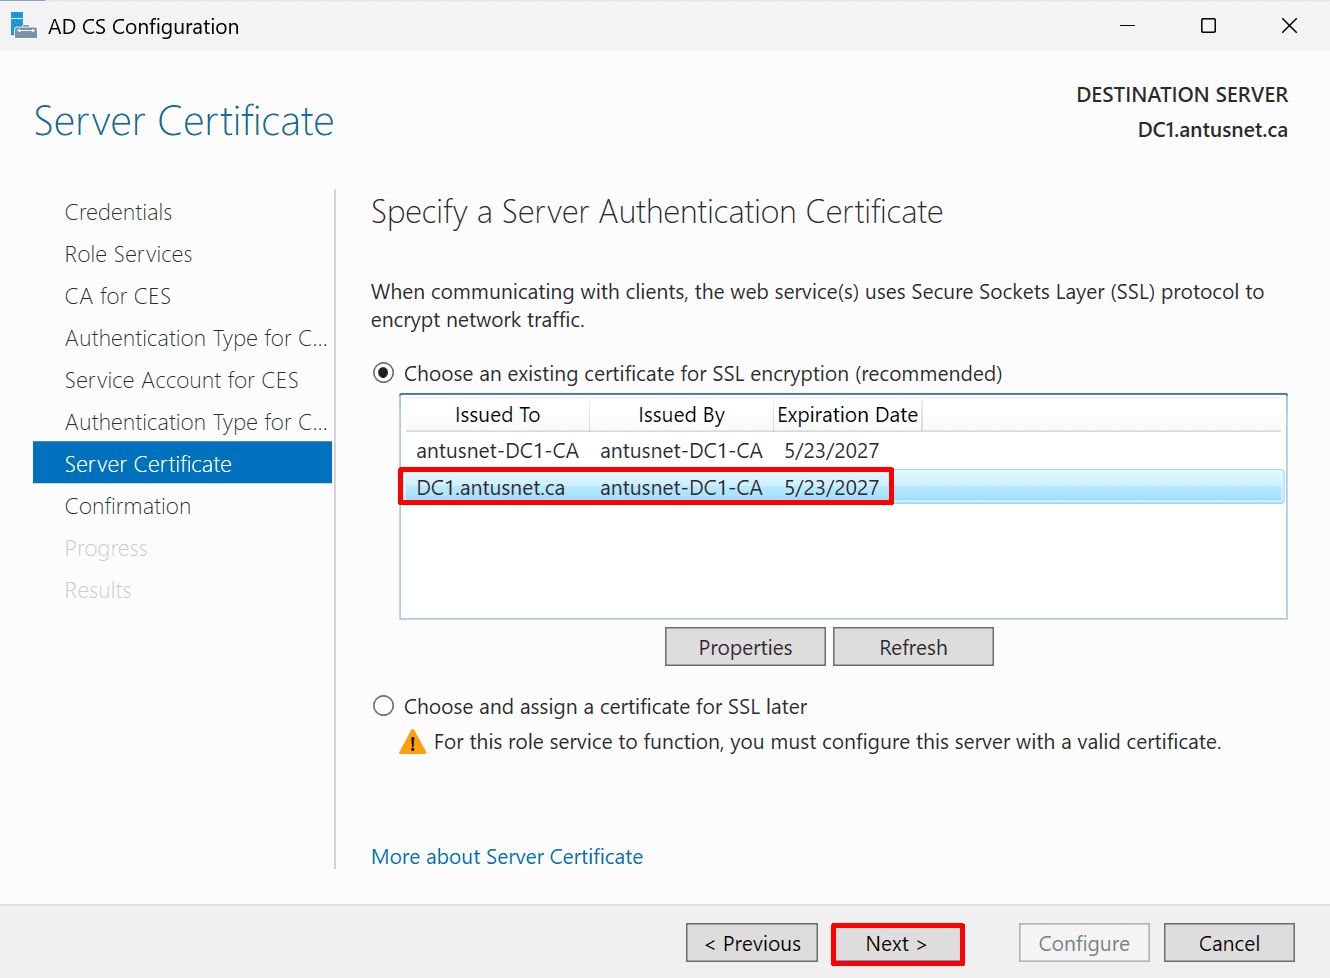
- Deploying an internal Certificate Authority using Active Directory Certificate Services (AD CS)
- Reverse proxy setup with Nginx: enforcing HTTPS (TLS 1.2/1.3), Basic authentication, rate limiting, and security headers - for both the raw Ollama API and the Open WebUI chat interface
- Container hardening: resource limits, capability drops, privilege escalation prevention, and network isolation
Whether you're a sysadmin standing up your first enterprise AI server, a security engineer building controls around an existing deployment, or a developer who wants to understand how the security layer wraps the model backend - this guide walks you through it step by step.
Note: For domain setup and Windows Active Directory configuration, refer to the companion guide at antusnet.ca/blog-grid/guides/active-directory-lab/
*
*
Task Details
1. Install Docker and update Ubuntu server.
2. Ollama Installation & Hardening
3. Ubuntu Server System Security: SSH hardening, Fail2Ban for brute-force protection, and AppArmor/SELinux.
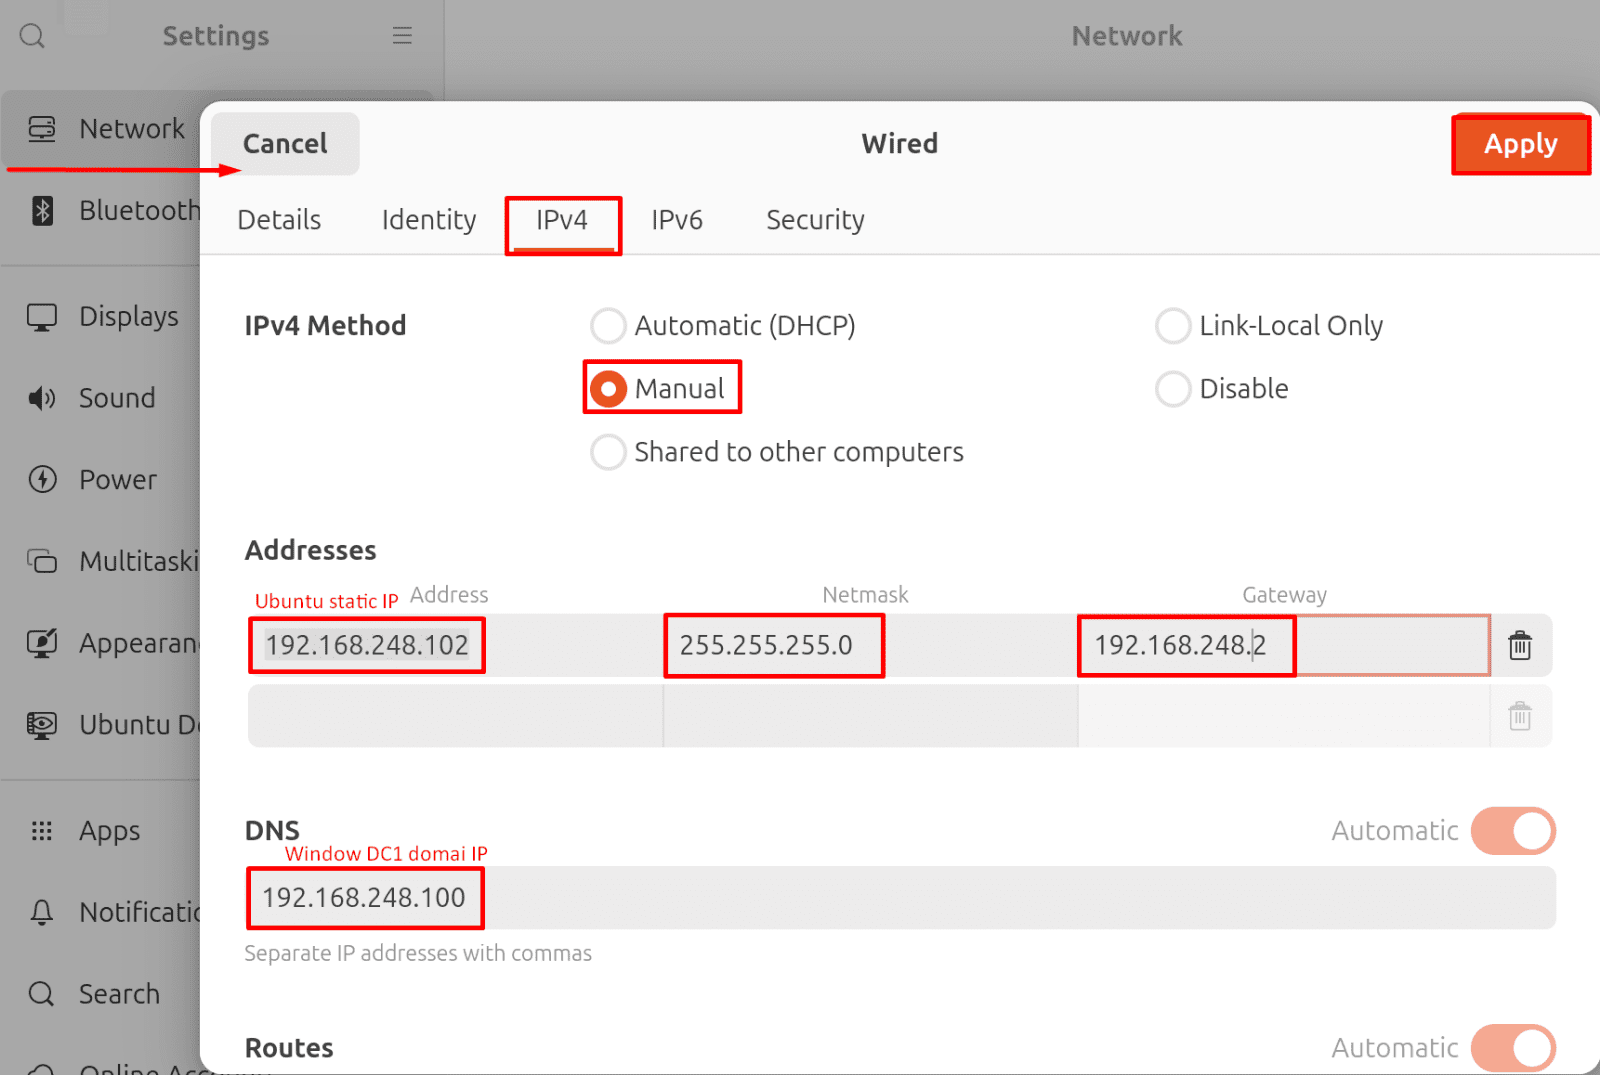
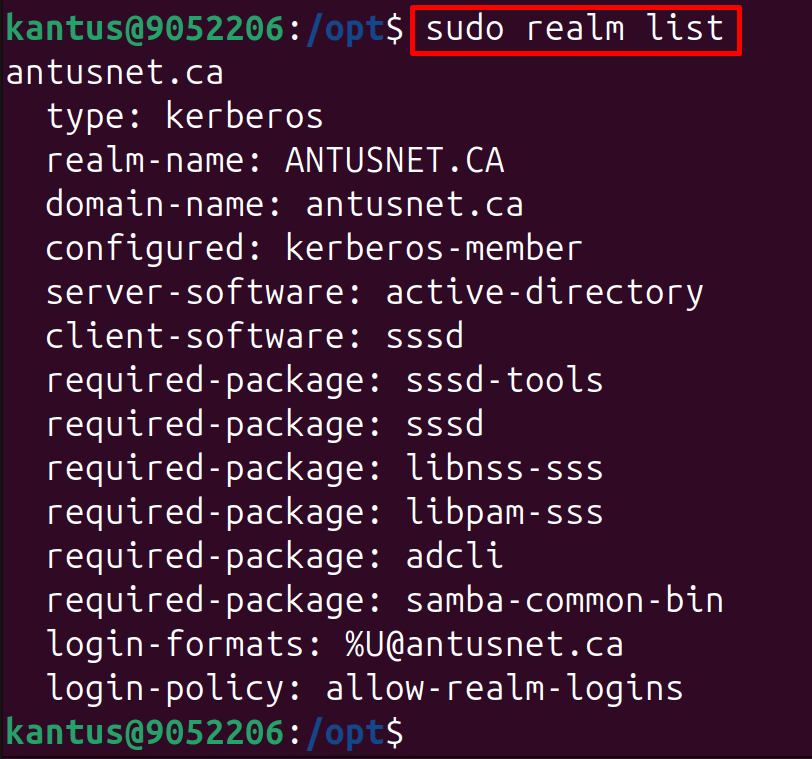
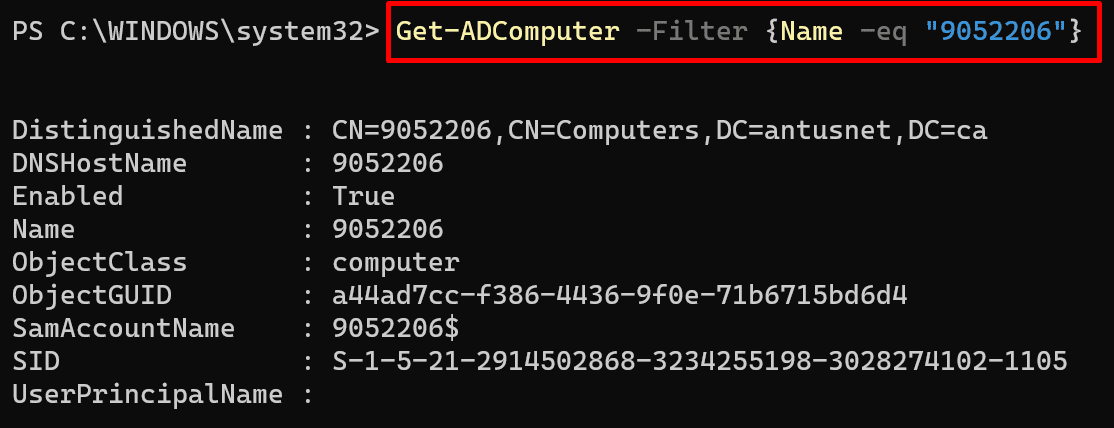
4. Join Ubuntu Server to the Windows Domain
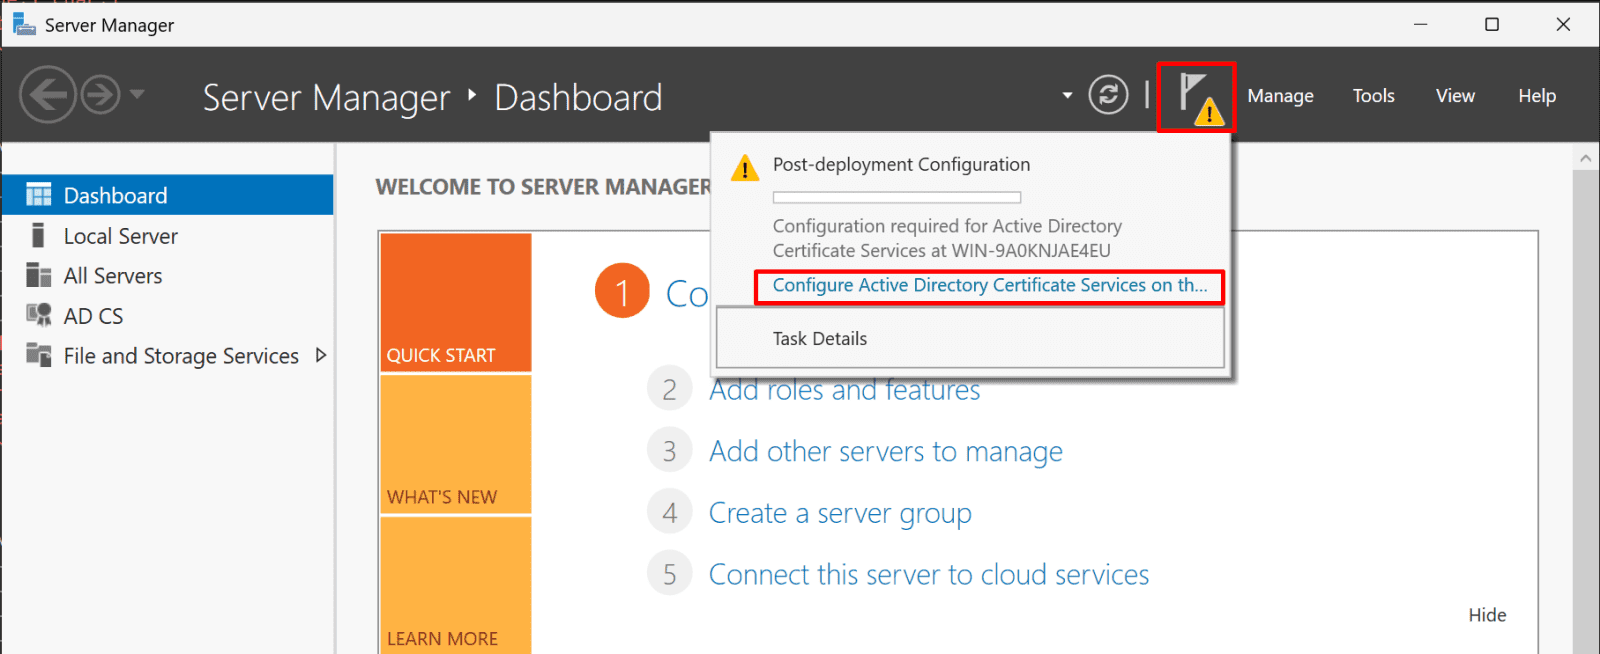
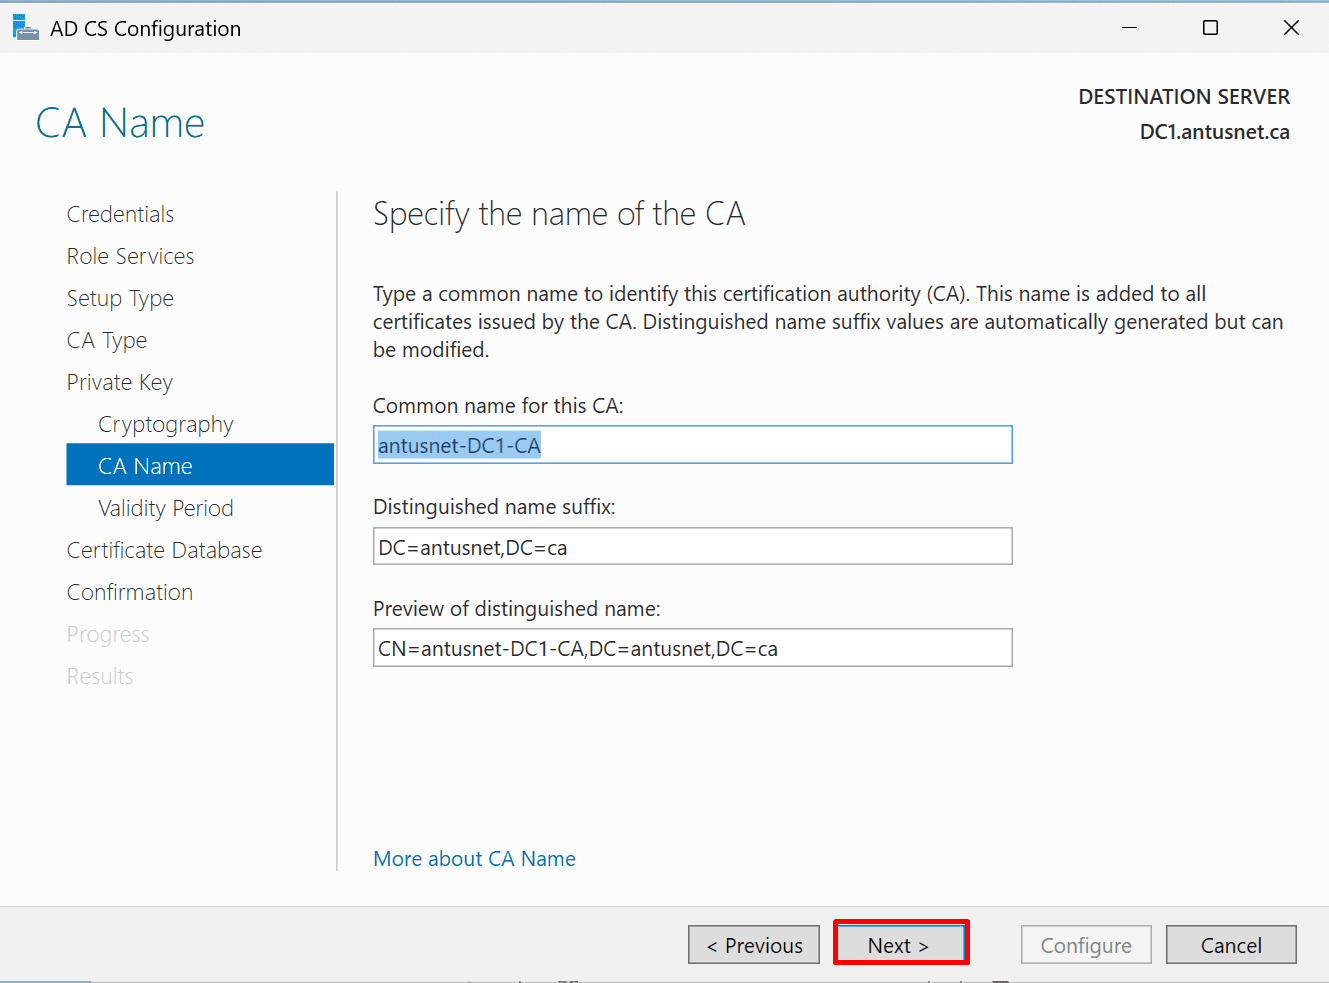
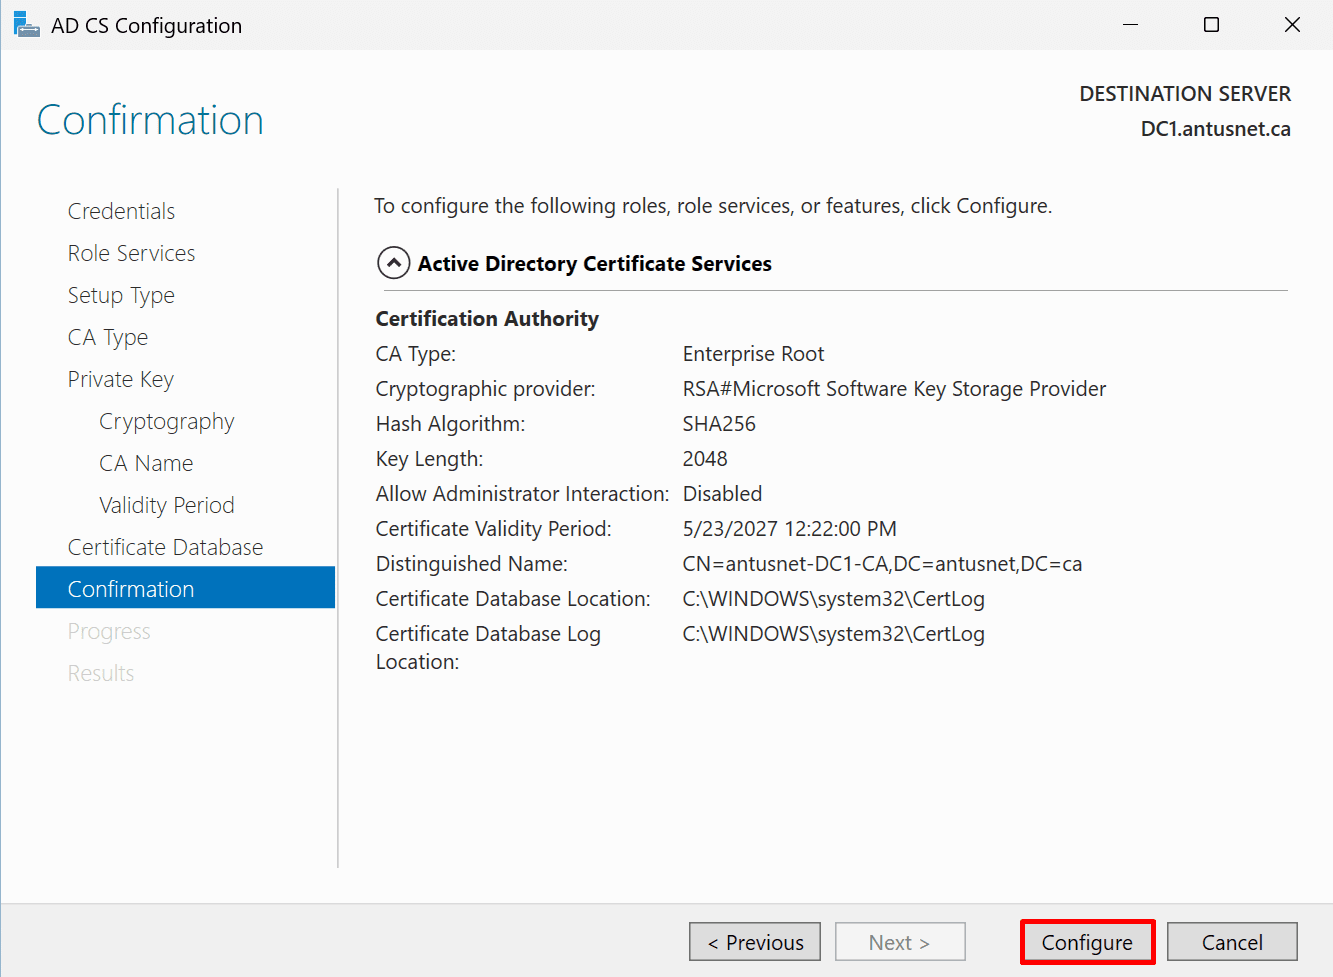
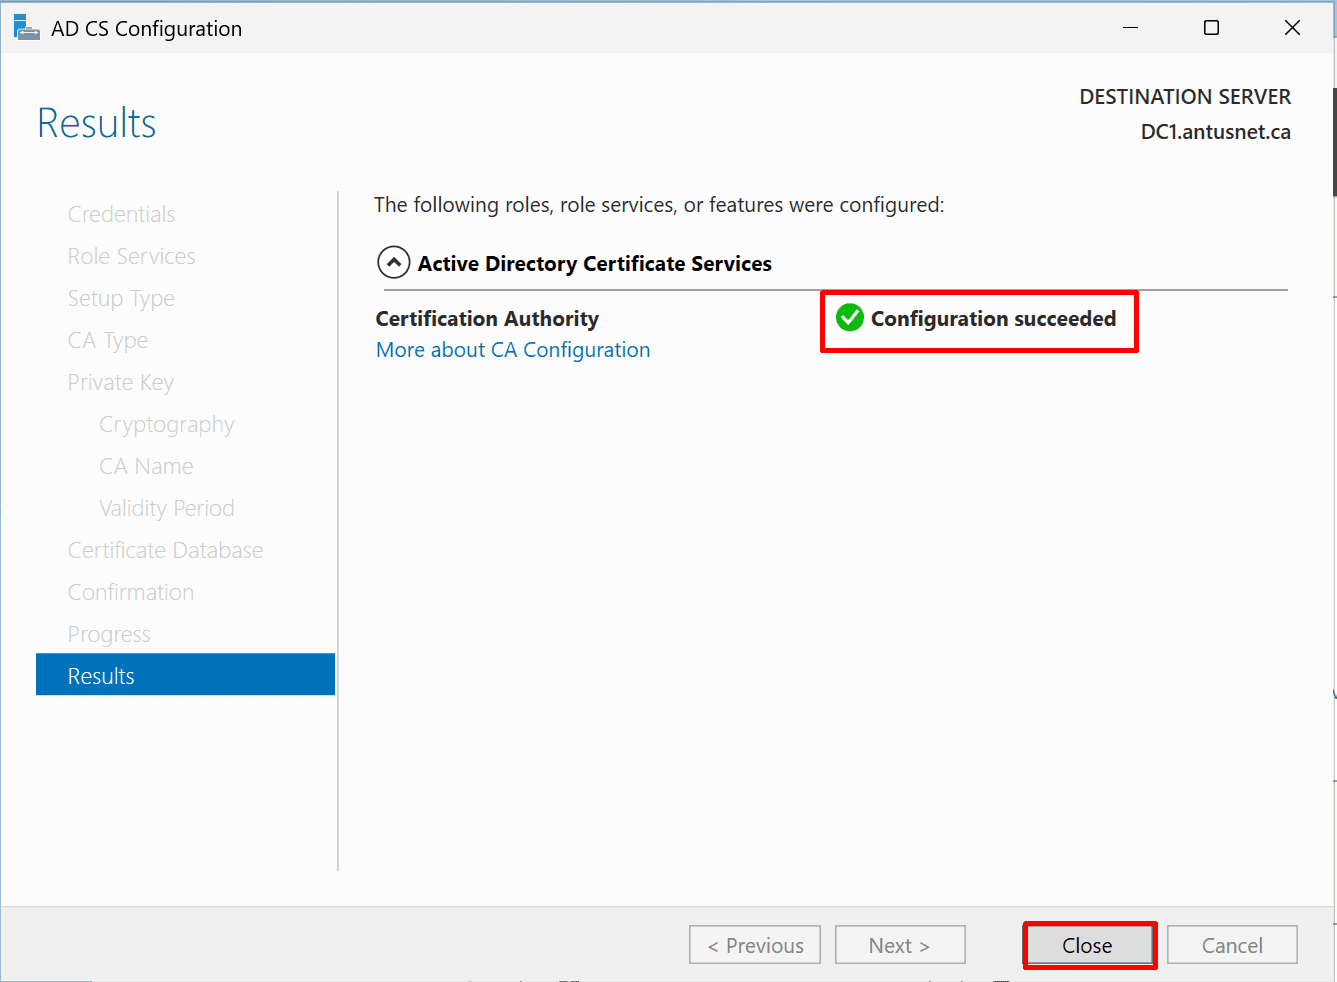
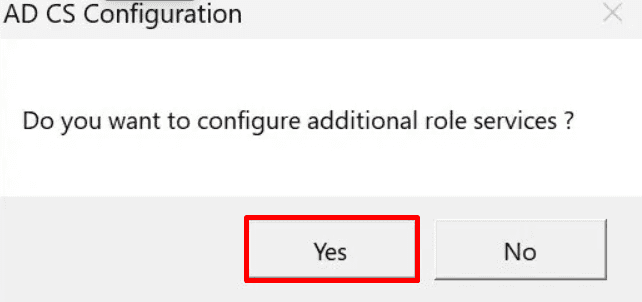
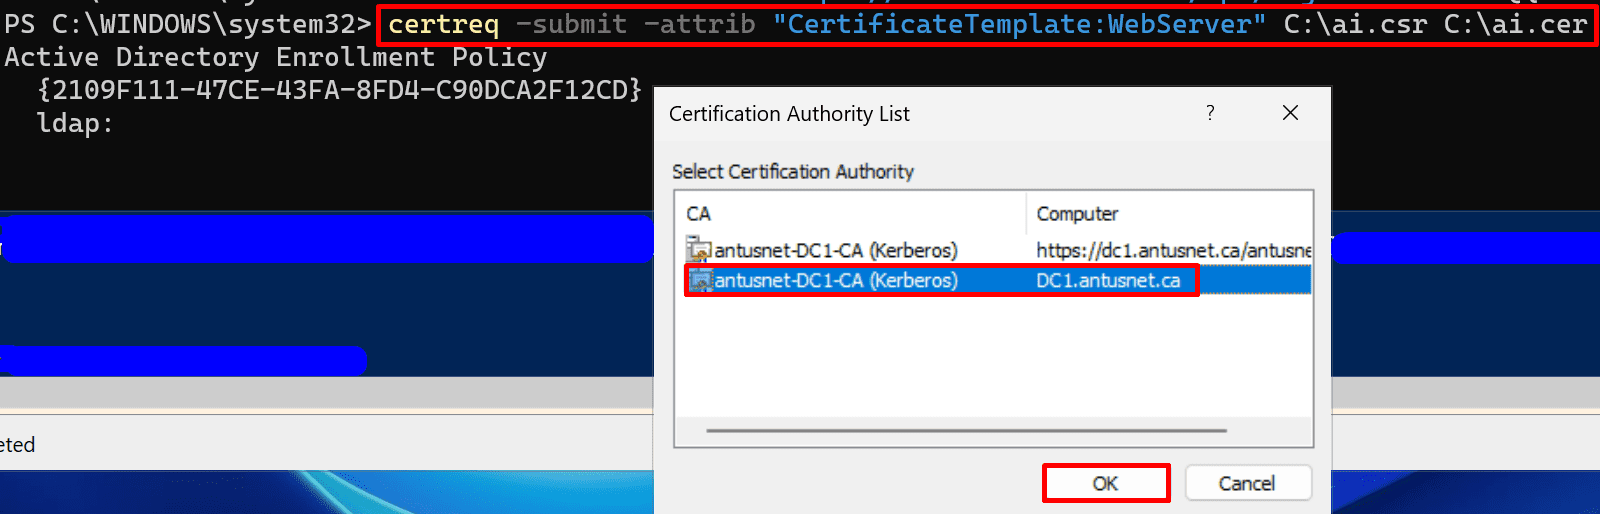
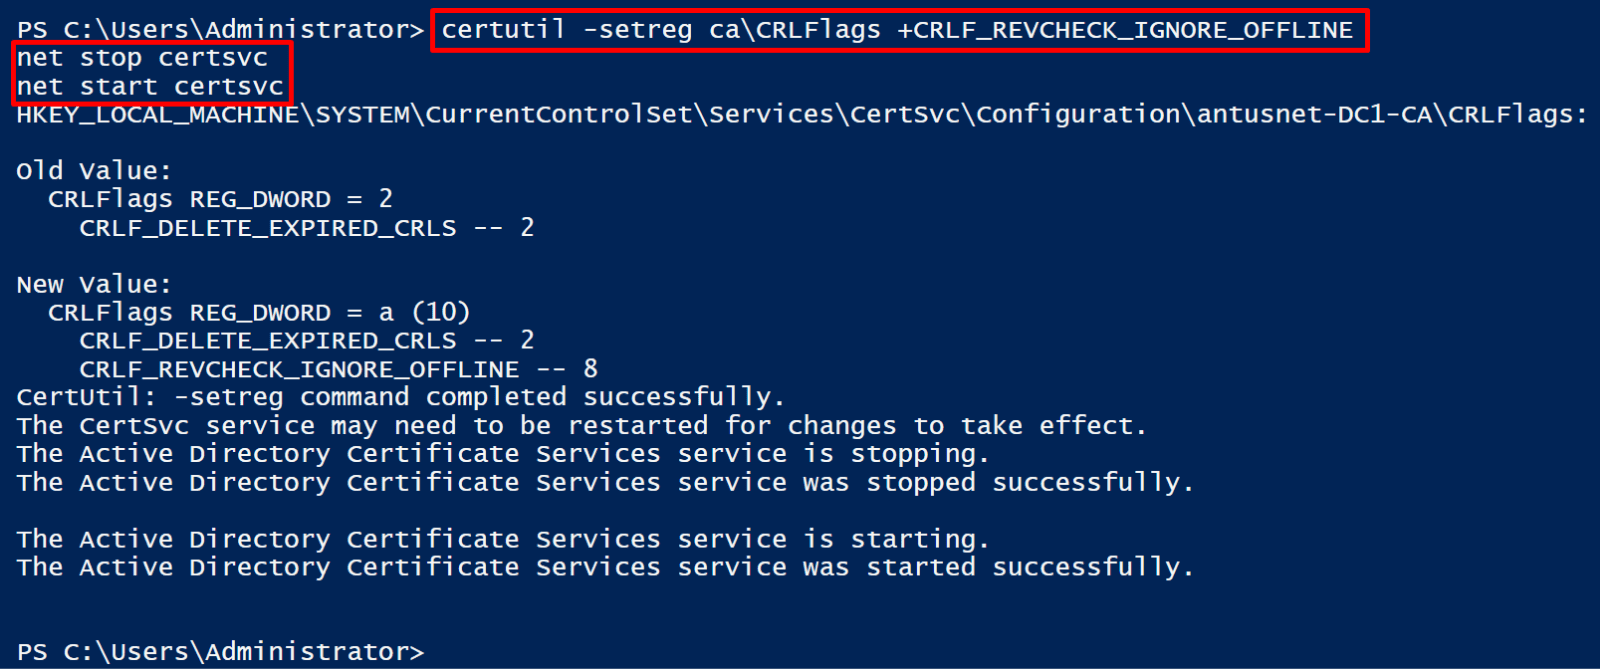
5. Install and Configure the CA on Windows domain.
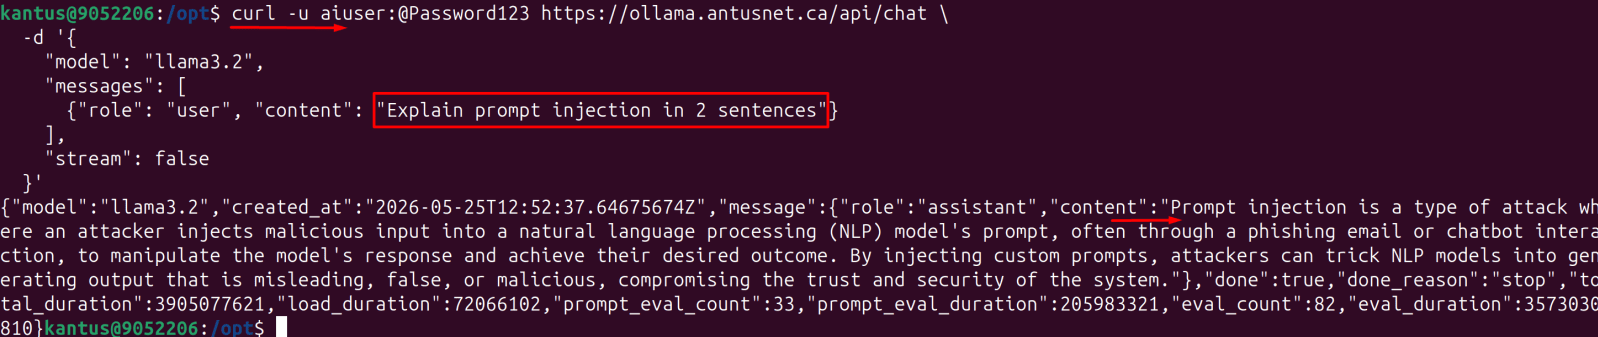
6. Reverse Proxy & HTTPS: Implement authentication mechanizm for raw Ollama API - for developers, scripts, API calls
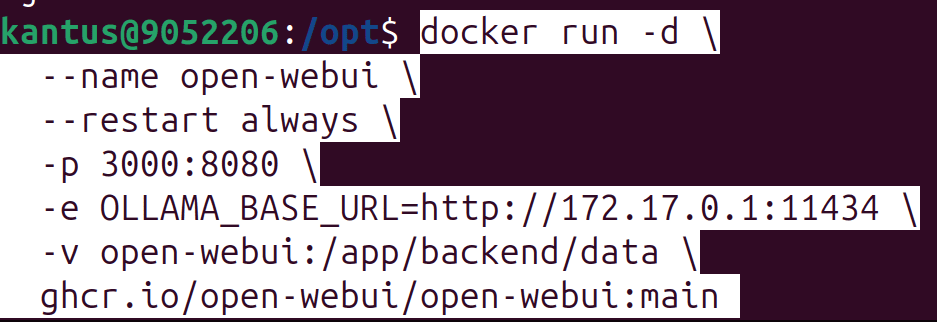
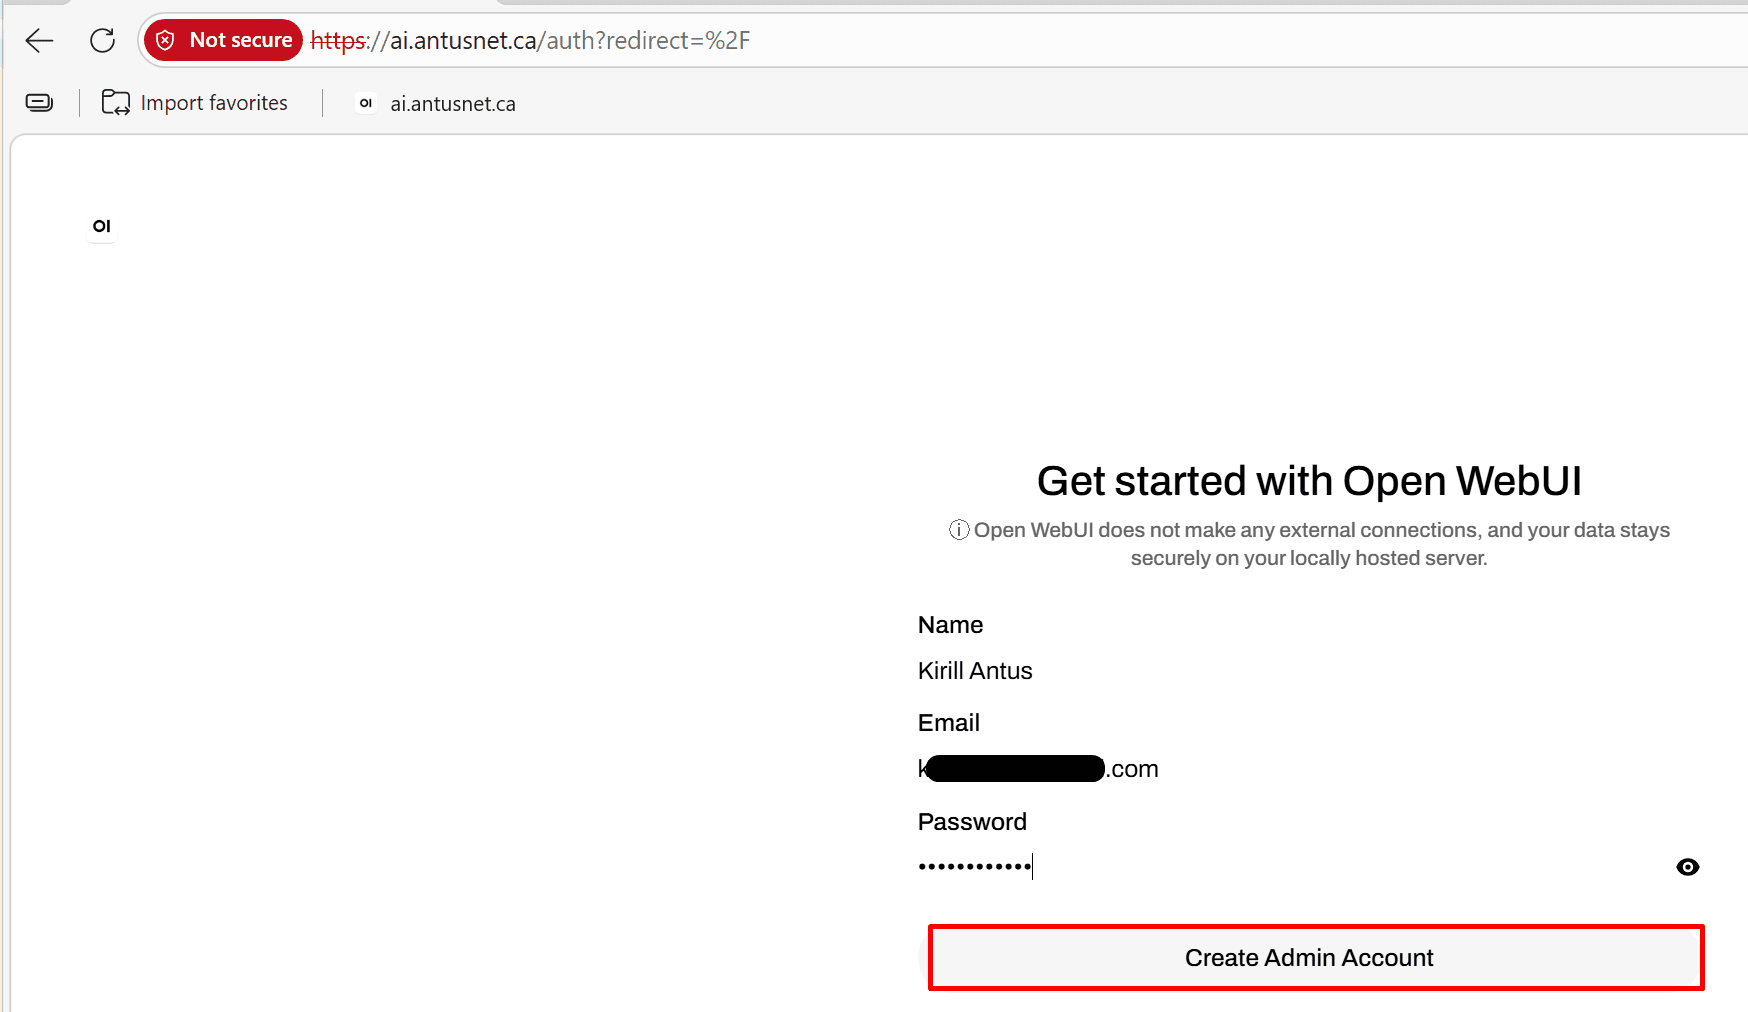
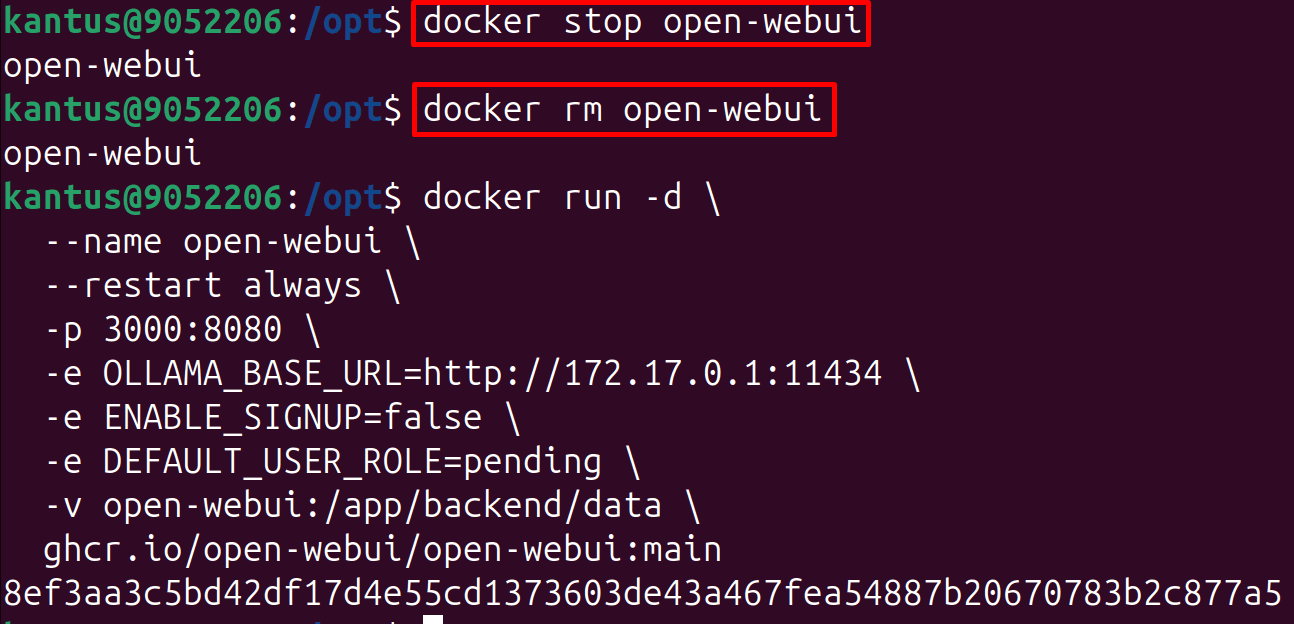
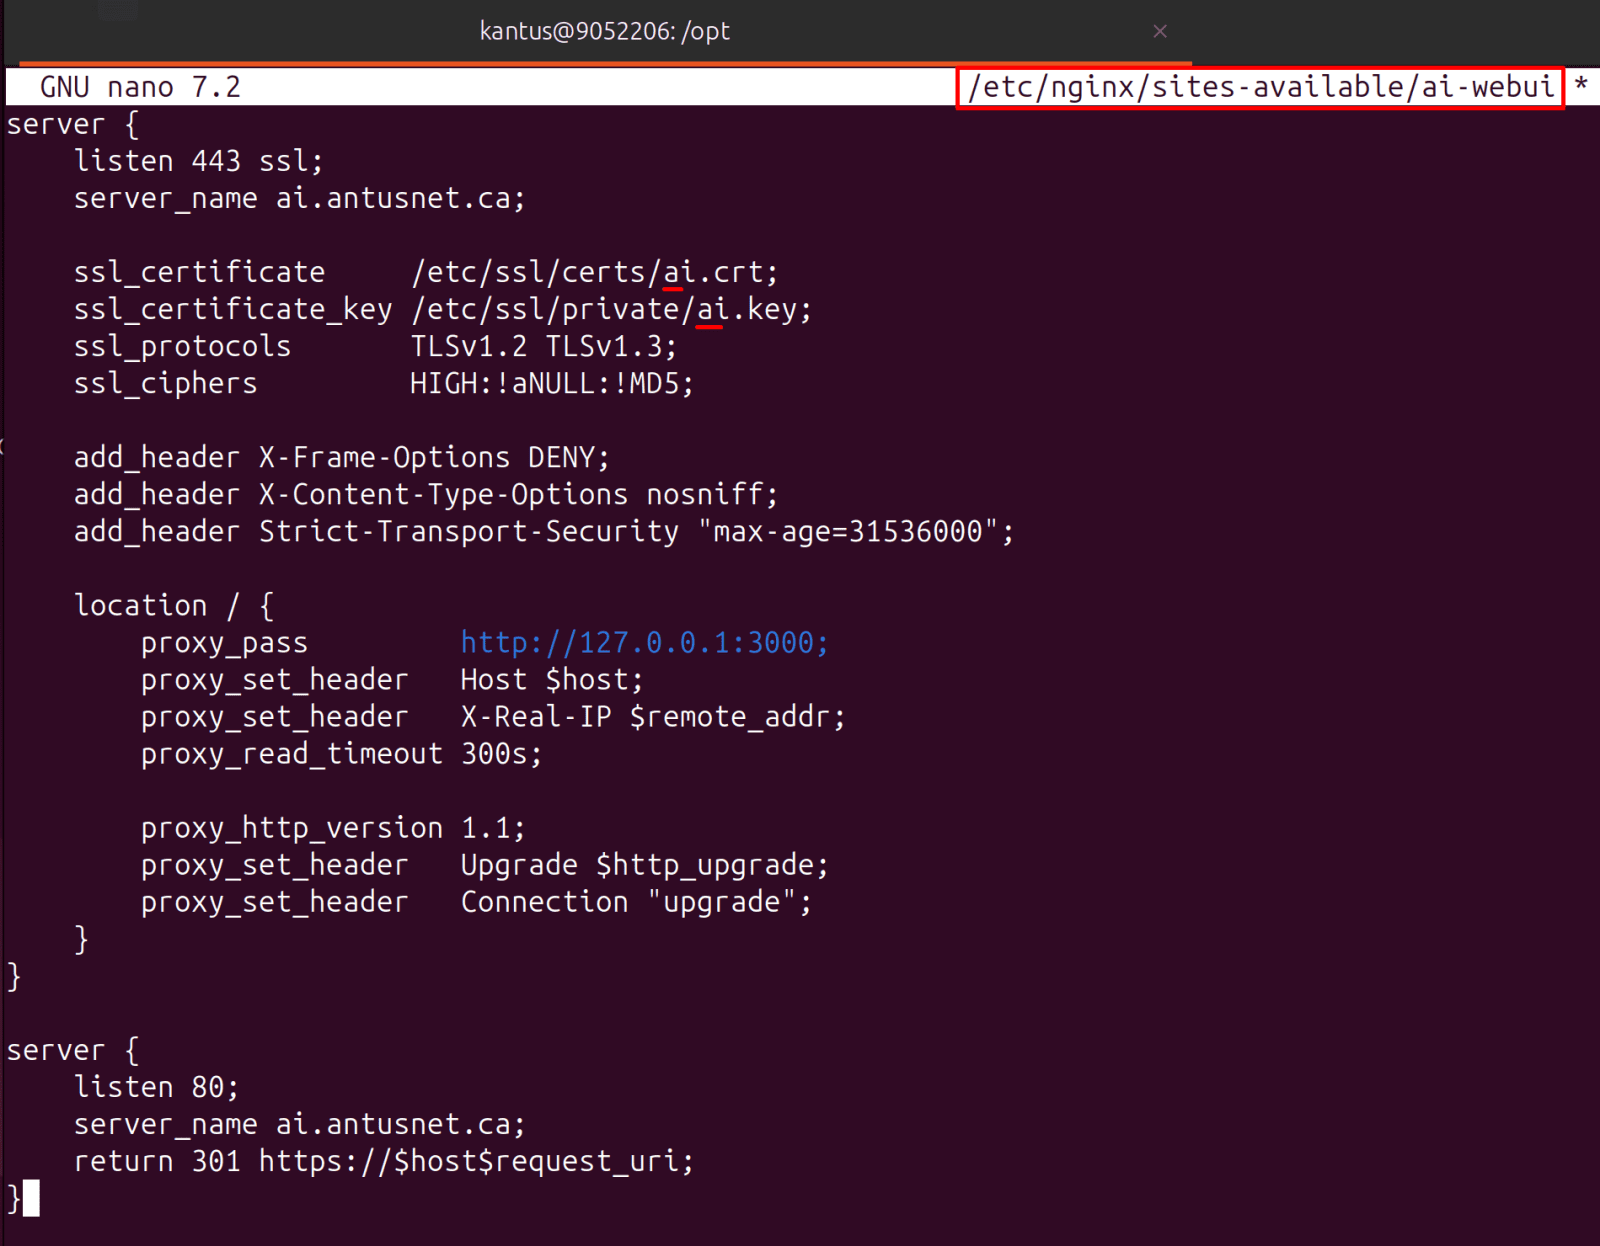
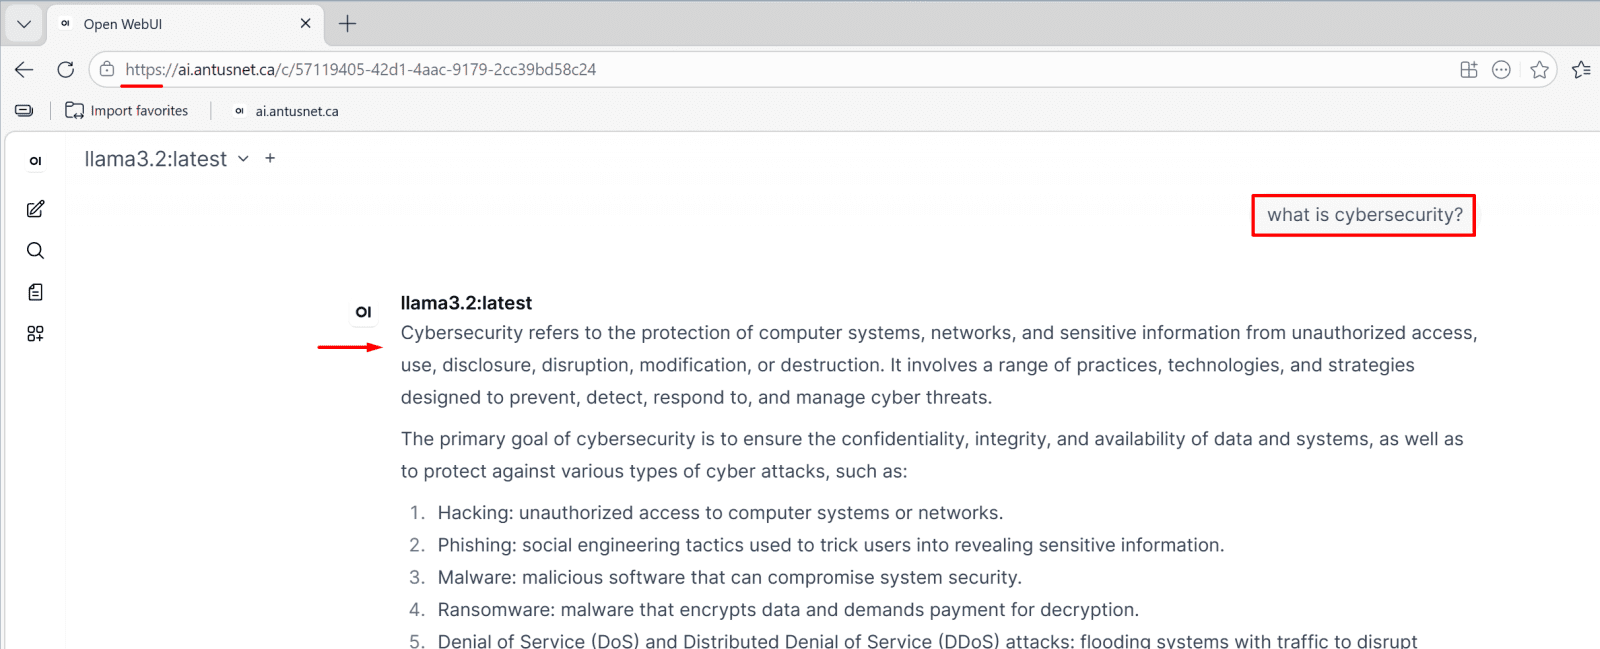
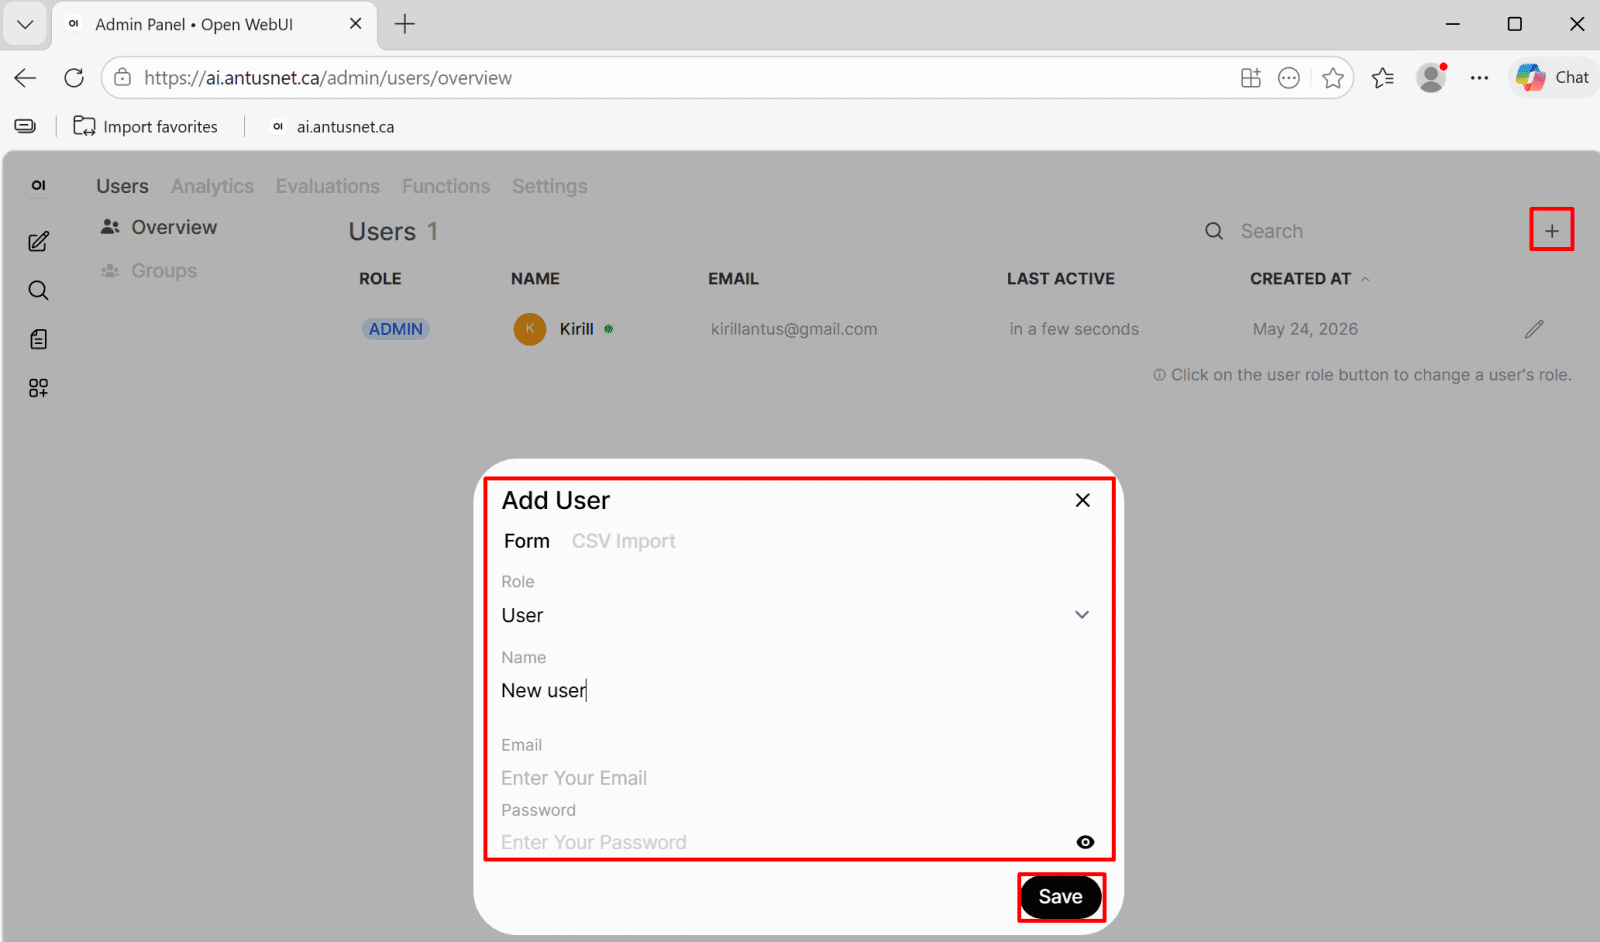
7. Reverse Proxy & HTTPS: Implement authentication mechanizm for Open WebUI - for end users, chat interface.
8. Container hardening on Ubuntu
*
All commands can be copied from here.
*
Steps
Install Docker and update the Ubuntu server.
Before deploying any AI/LLM tools, the Ubuntu server must be fully updated to apply the latest security patches and system fixes. This reduces vulnerabilities and ensures a stable base system.
Docker is then installed to run services like Ollama and supporting security tools in isolated containers, improving portability and reducing system risk.
*
1. Update Ubuntu Server
- sudo apt update && sudo apt upgrade -y
Note: I used the Ubuntu Server GUI for demonstration purposes. Command: sudo apt install ubuntu-desktop
![]()
*
2. Install Docker.
- curl -fsSL https://get.docker.com | sh
- sudo usermod -aG docker $USER
- newgrp docker
![]()
--SNIP--
![]()
*
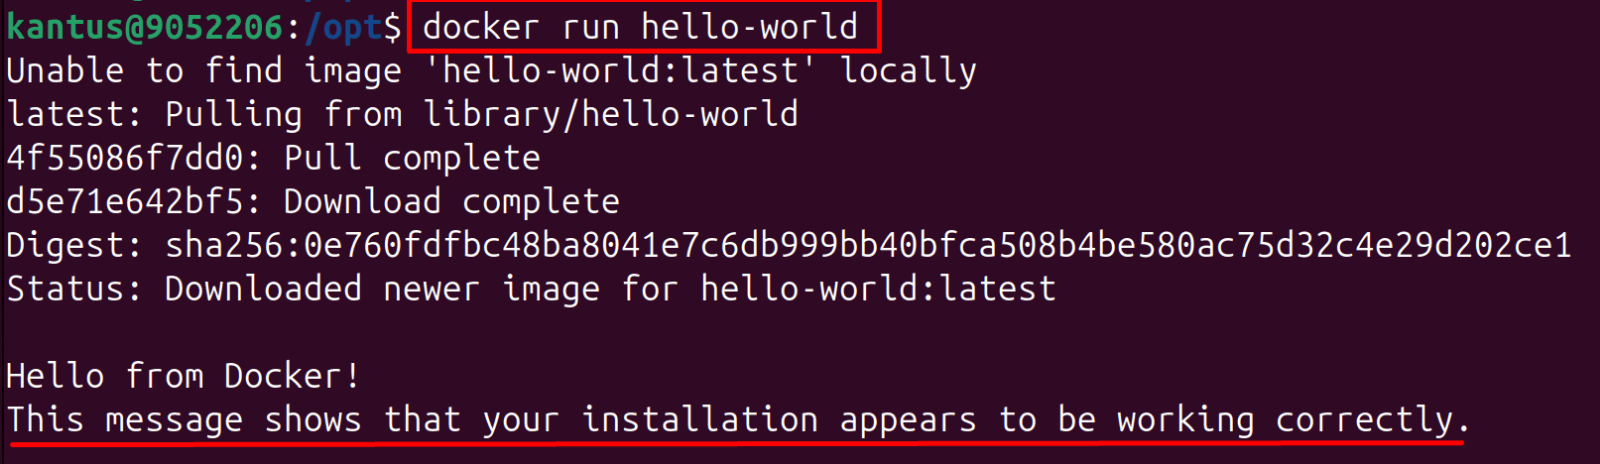
3. Then verify Docker works:
- docker run hello-world
*
Ollama Installation & Hardening
Local LLM deployments allow AI models to run directly on your own infrastructure instead of relying on external cloud APIs. In this guide, we use Ollama to demonstrate a secure and practical way to host and interact with large language models locally.
This approach improves privacy, reduces data exposure, and gives full control over model access, logging, and network exposure. It also introduces new security considerations such as local API protection, access control, and safe integration with internal applications.
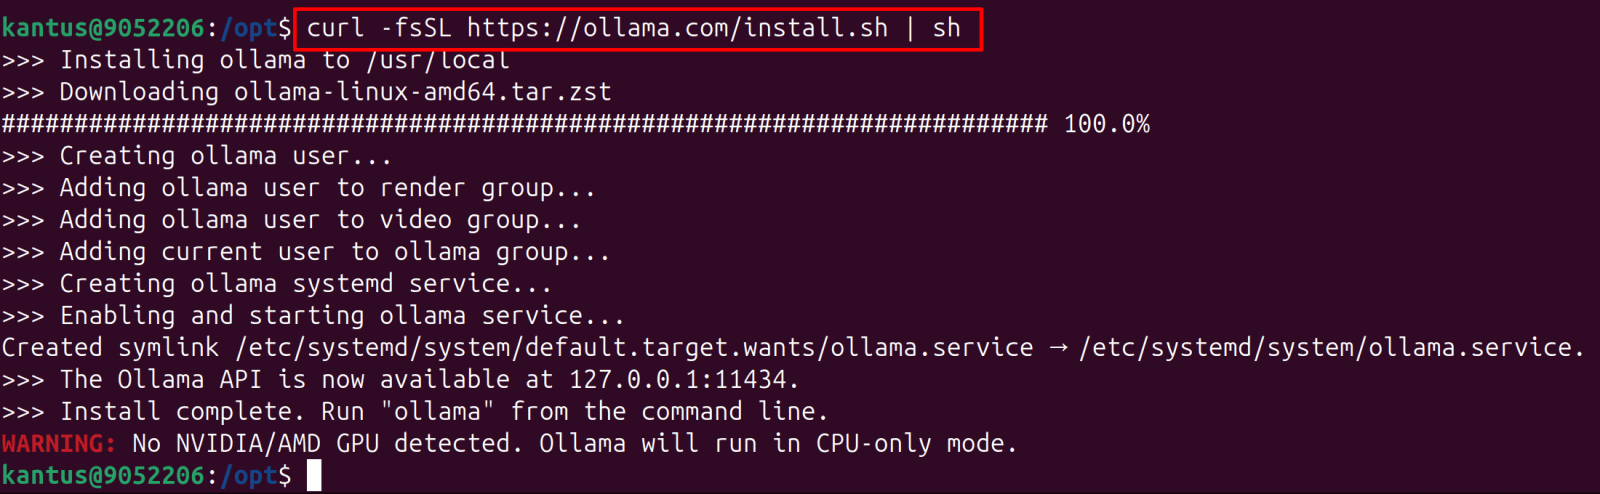
1. Install Ollama on Ubuntu server
- curl -fsSL https://ollama.com/install.sh | sh
Note: In enterprise environments, Linux (Ubuntu/RHEL) is dominant for running LLMs.
Note: VMs do not natively access the host GPU, but GPU access is available on a bare-metal Ubuntu installation.
*
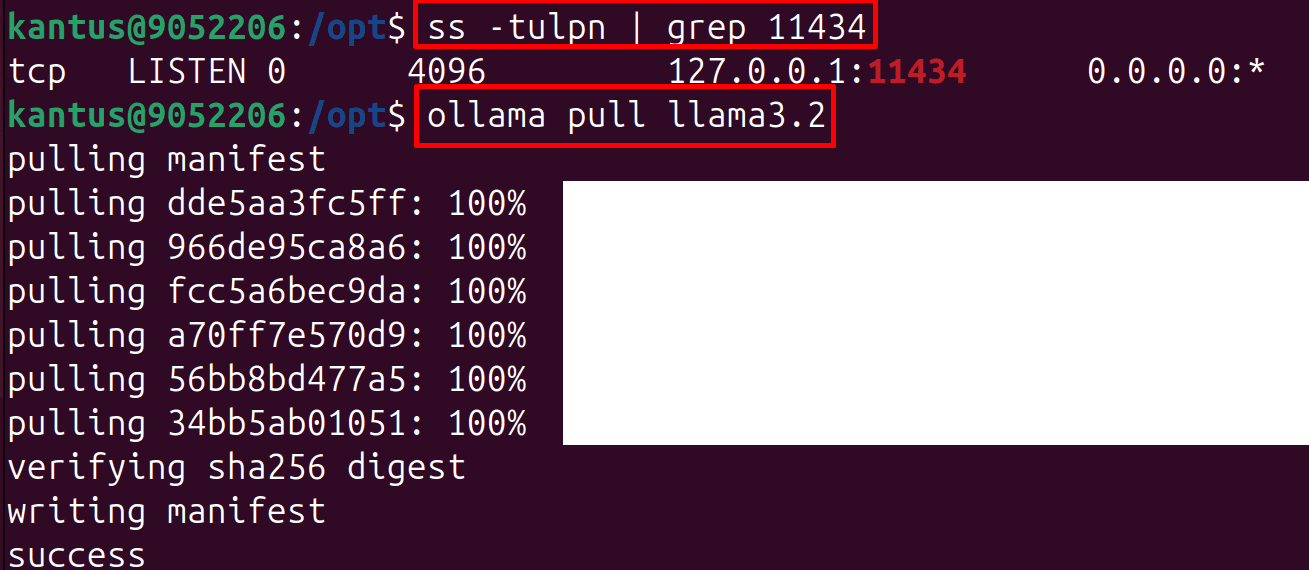
2. Verify Binding (Critical)
- ss -tulpn | grep 11434
Note: The single most important check: Ollama must only listen on localhost. If you see '0.0.0.0:11434' or ':::11434' Restrict immediately.
Linux - edit systemd service
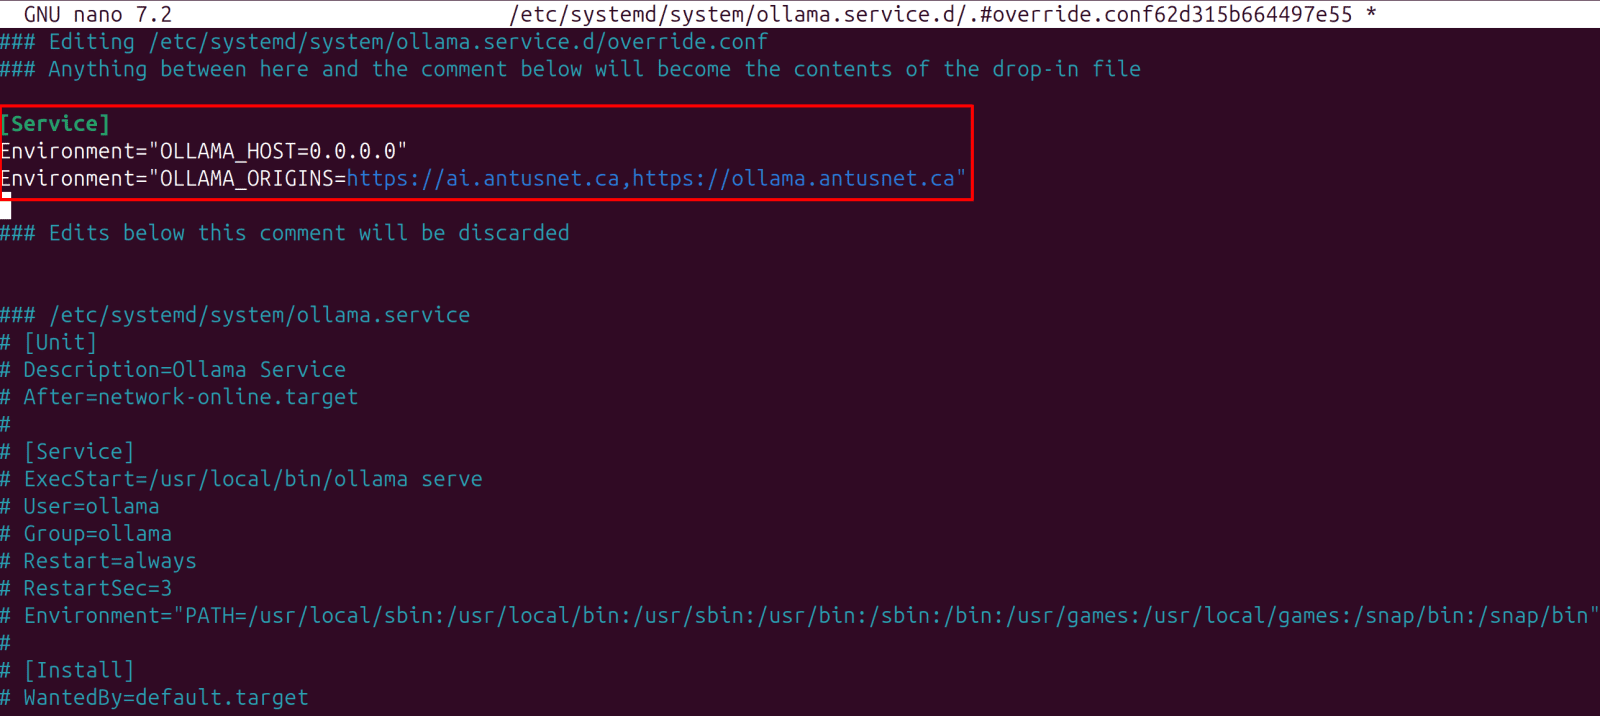
- sudo systemctl edit ollama
Add the following block: (Will edit this later)
[Service]
Environment="OLLAMA_HOST=127.0.0.1"
Reload and restart
- sudo systemctl daemon-reload
- sudo systemctl restart ollama
![]()
*
3. Pull a model to test with.
- ollama pull llama3.2
*
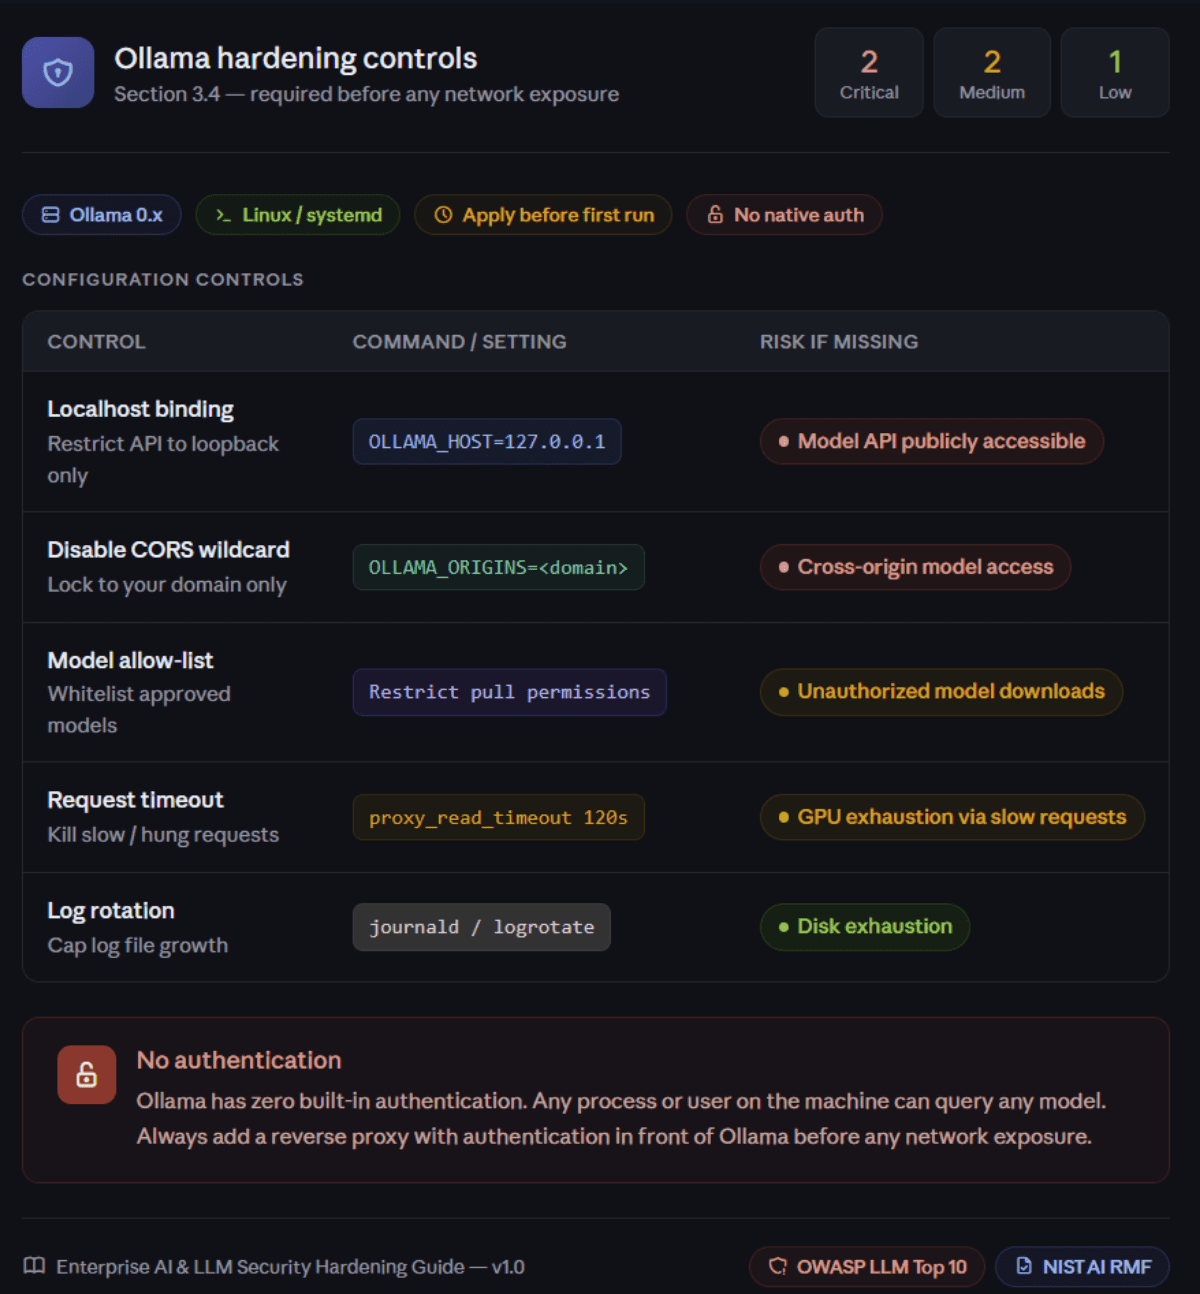
4. Ollama Hardening Checklist
*
Ubuntu Server System Security: SSH hardening, Fail2Ban for brute-force protection, and AppArmor/SELinux.
Securing the underlying OS is foundational. A compromised host gives attackers direct access to model weights, embeddings, and all API traffic.
Linux Hardening
1. Apply all security updates.
- sudo apt update && sudo apt upgrade -y

*
2. Enable automatic security updates
- sudo apt install unattended-upgrades -y
- sudo dpkg-reconfigure --priority=low unattended-upgrades

--SNIP--
![]()
*
3. Enable and configure UFW firewall
- sudo ufw default deny incoming
- sudo ufw default allow outgoing
- sudo ufw allow 22/tcp
- sudo ufw allow 443/tcp
- sudo ufw enable

*
3. Verify rules
- sudo ufw status verbose

*
SSH Hardening
1. Configure the /etc/ssh/sshd_config file using the following recommended settings:
- nano /etc/ssh/sshd_config
Uncomment / comment or add those lines and adjust the values if needed.
PermitRootLogin no
PasswordAuthentication no
PubkeyAuthentication yes
MaxAuthTries 3
ClientAliveInterval 300
ClientAliveCountMax 2

*
2. Restart SSH for the settings to take effect.
- sudo systemctl restart ssh
![]()
*
Fail2Ban for Brute-Force Protection
Fail2Ban is a security tool used to protect services like SSH by automatically blocking IPs that show repeated failed login attempts. It helps reduce brute-force attacks and strengthens the overall security posture of the system.
1. Install Fail2Ban
- sudo apt install fail2ban -y

*
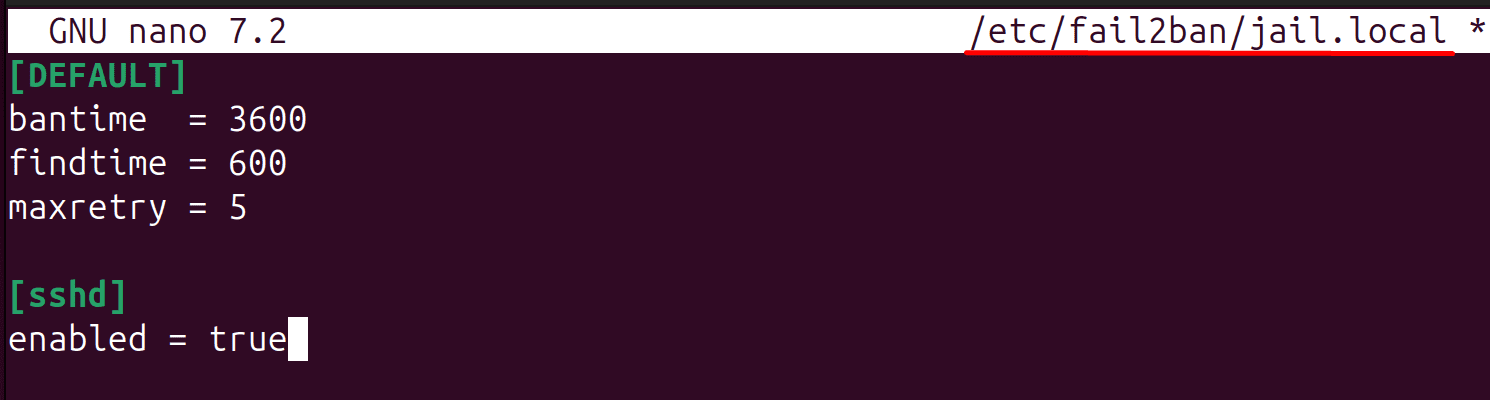
2. Configure the /etc/fail2ban/jail.local file using the following recommended settings:
- nano /etc/fail2ban/jail.local
Paste this
[DEFAULT]
bantime = 3600
findtime = 600
maxretry = 5
[sshd]
enabled = true
*
3. Restart Fail2Ban to apply settings.
- sudo systemctl restart fail2ban
![]()
*
4. Check the status and ensure it is enabled. If not, run sudo systemctl enable fail2ban.
- sudo systemctl is-enabled fail2ban

*
AppArmor / SELinux
AppArmor and SELinux are mandatory access control (MAC) frameworks that restrict what processes can do on a system, even if they are compromised. They add an extra security layer by enforcing fine-grained policies to limit application behavior and reduce the impact of potential breaches.
1. Verify AppArmor is active
- sudo aa-status
Note: What you see is actually perfect:
- apparmor module is loaded
- 185 profiles are loaded
- 88 profiles are in enforce mode